
Connecting your Bubble app
Connect your Bubble app to Buildprint so Buildprint can sync your app, check permissions, and prepare the project for agents.
Before you start
You will need:
Access to the Bubble app you want to connect
Permission to invite collaborators in Bubble
Your Bubble app ID
Access to either the app's SEO settings or API settings
Your Bubble app ID is usually the subdomain in your Bubble app URL. For example, if your app is at https://myapp.bubbleapps.io, the app ID is myapp.
If your app uses a custom domain, use the Bubble app ID instead of the custom domain.
Add your app details
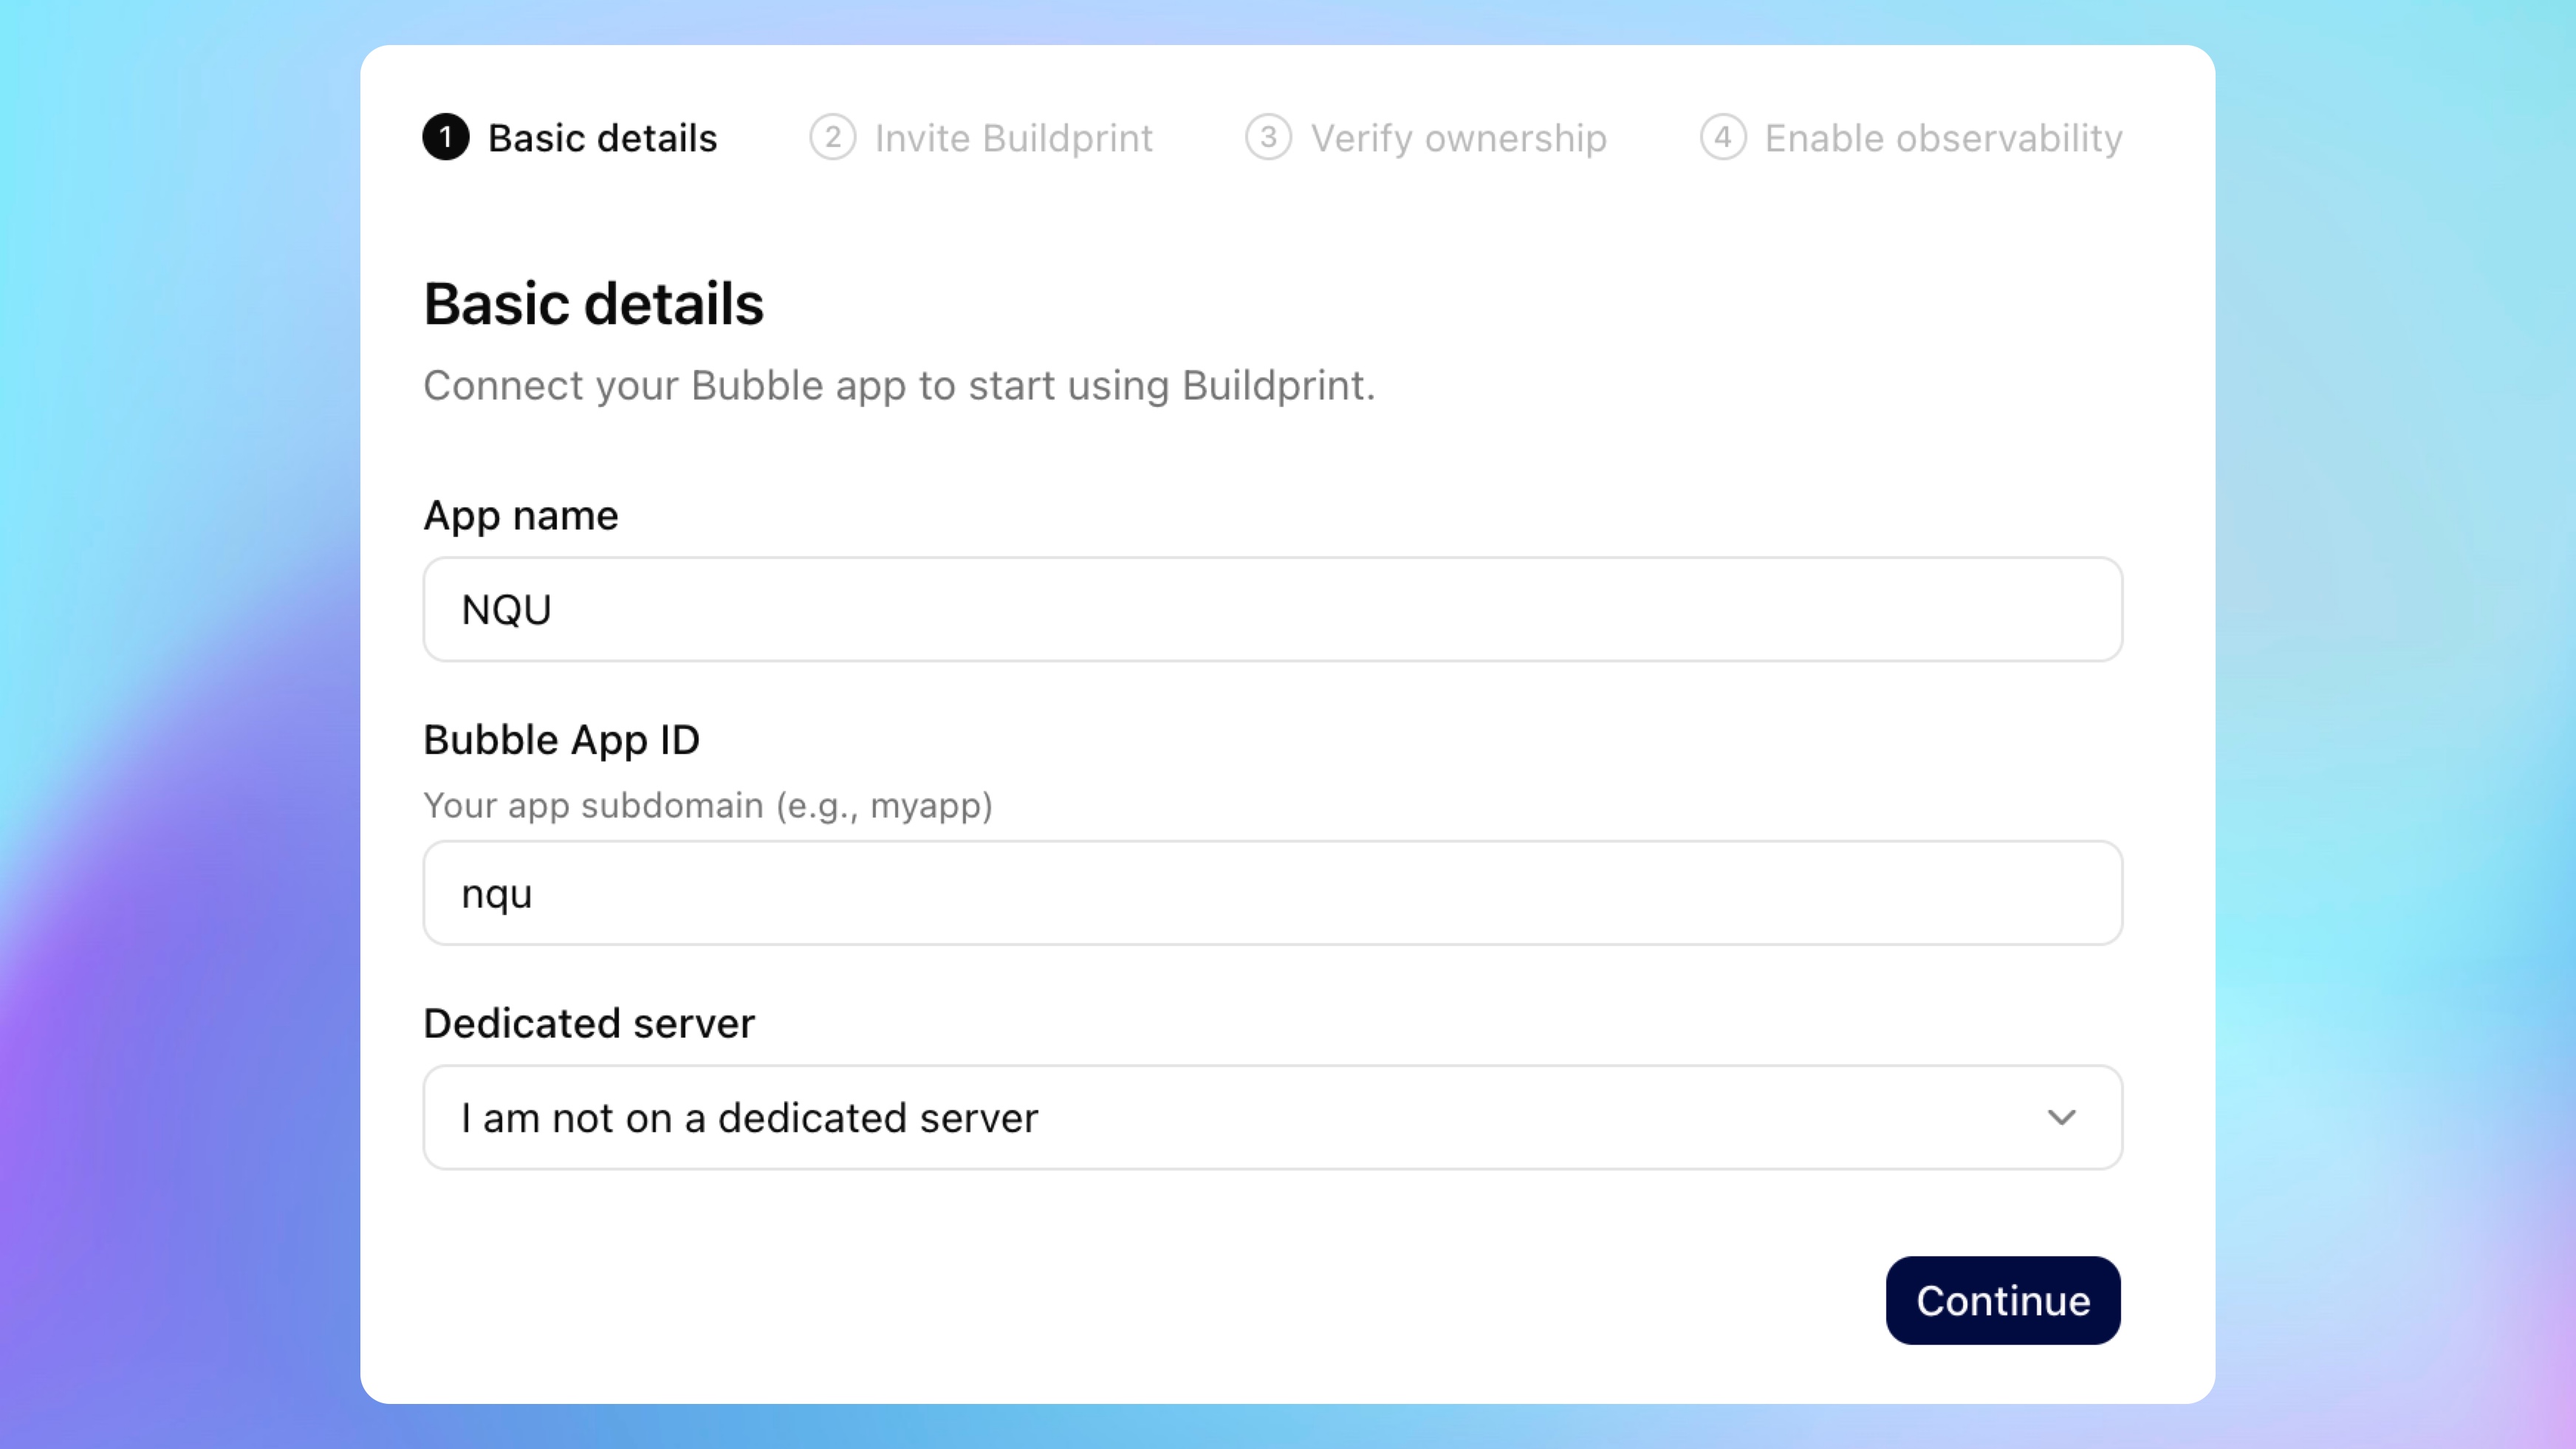
Start by telling Buildprint which Bubble app you want to connect.
Enter a name for the app.
Enter the Bubble App ID.
Choose whether the app is on a dedicated server.
Click Continue.
The app name is only for display inside Buildprint. The Bubble App ID is what Buildprint uses to find the correct Bubble app.
Invite Buildprint
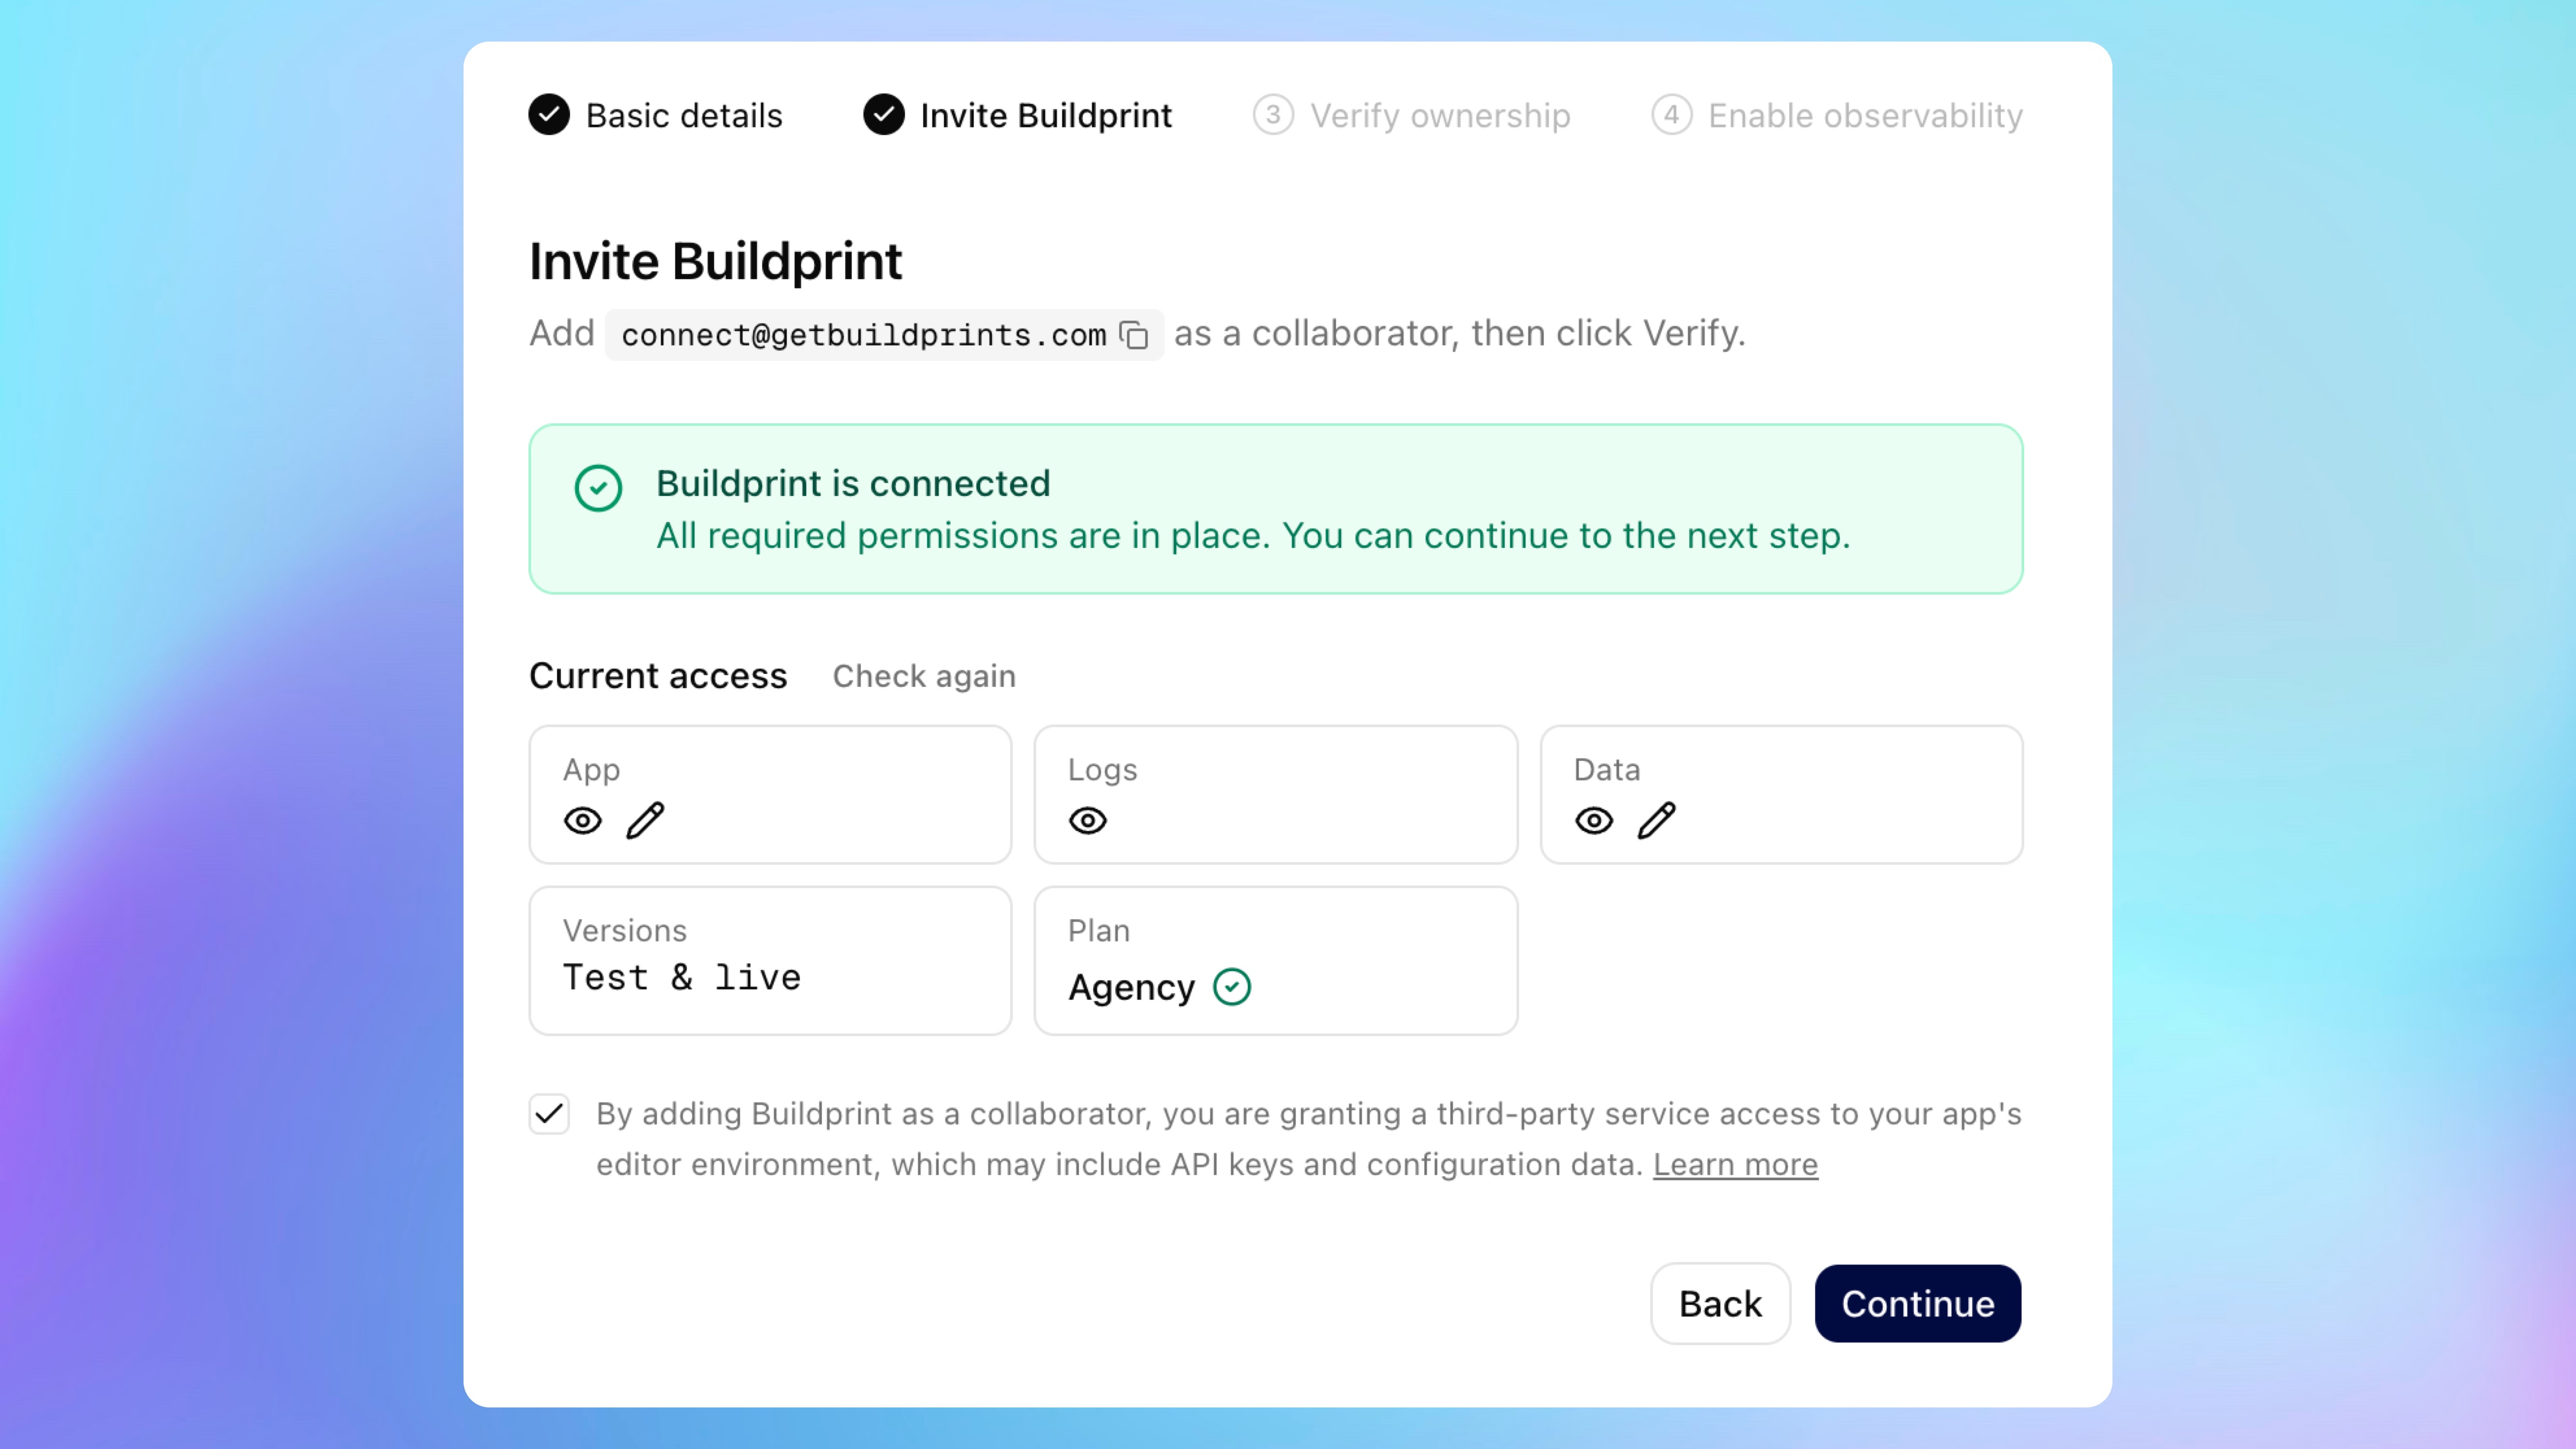
Next, add Buildprint as a collaborator in Bubble.
Open your app in Bubble.
Go to your app's collaborator settings.
Invite
[email protected].Grant the required App, Data, Logs, and Versions access.
Return to Buildprint.
Click Check again or Verify.
When the connection is ready, Buildprint shows a confirmation message and lists the current access it found.
Review the access notice, then click Continue.
Verify ownership
Buildprint needs to confirm that you own the Bubble app before setup can continue. You can verify ownership with a metatag or an Admin API token.
You only need to use one method.
Option A: Use a metatag
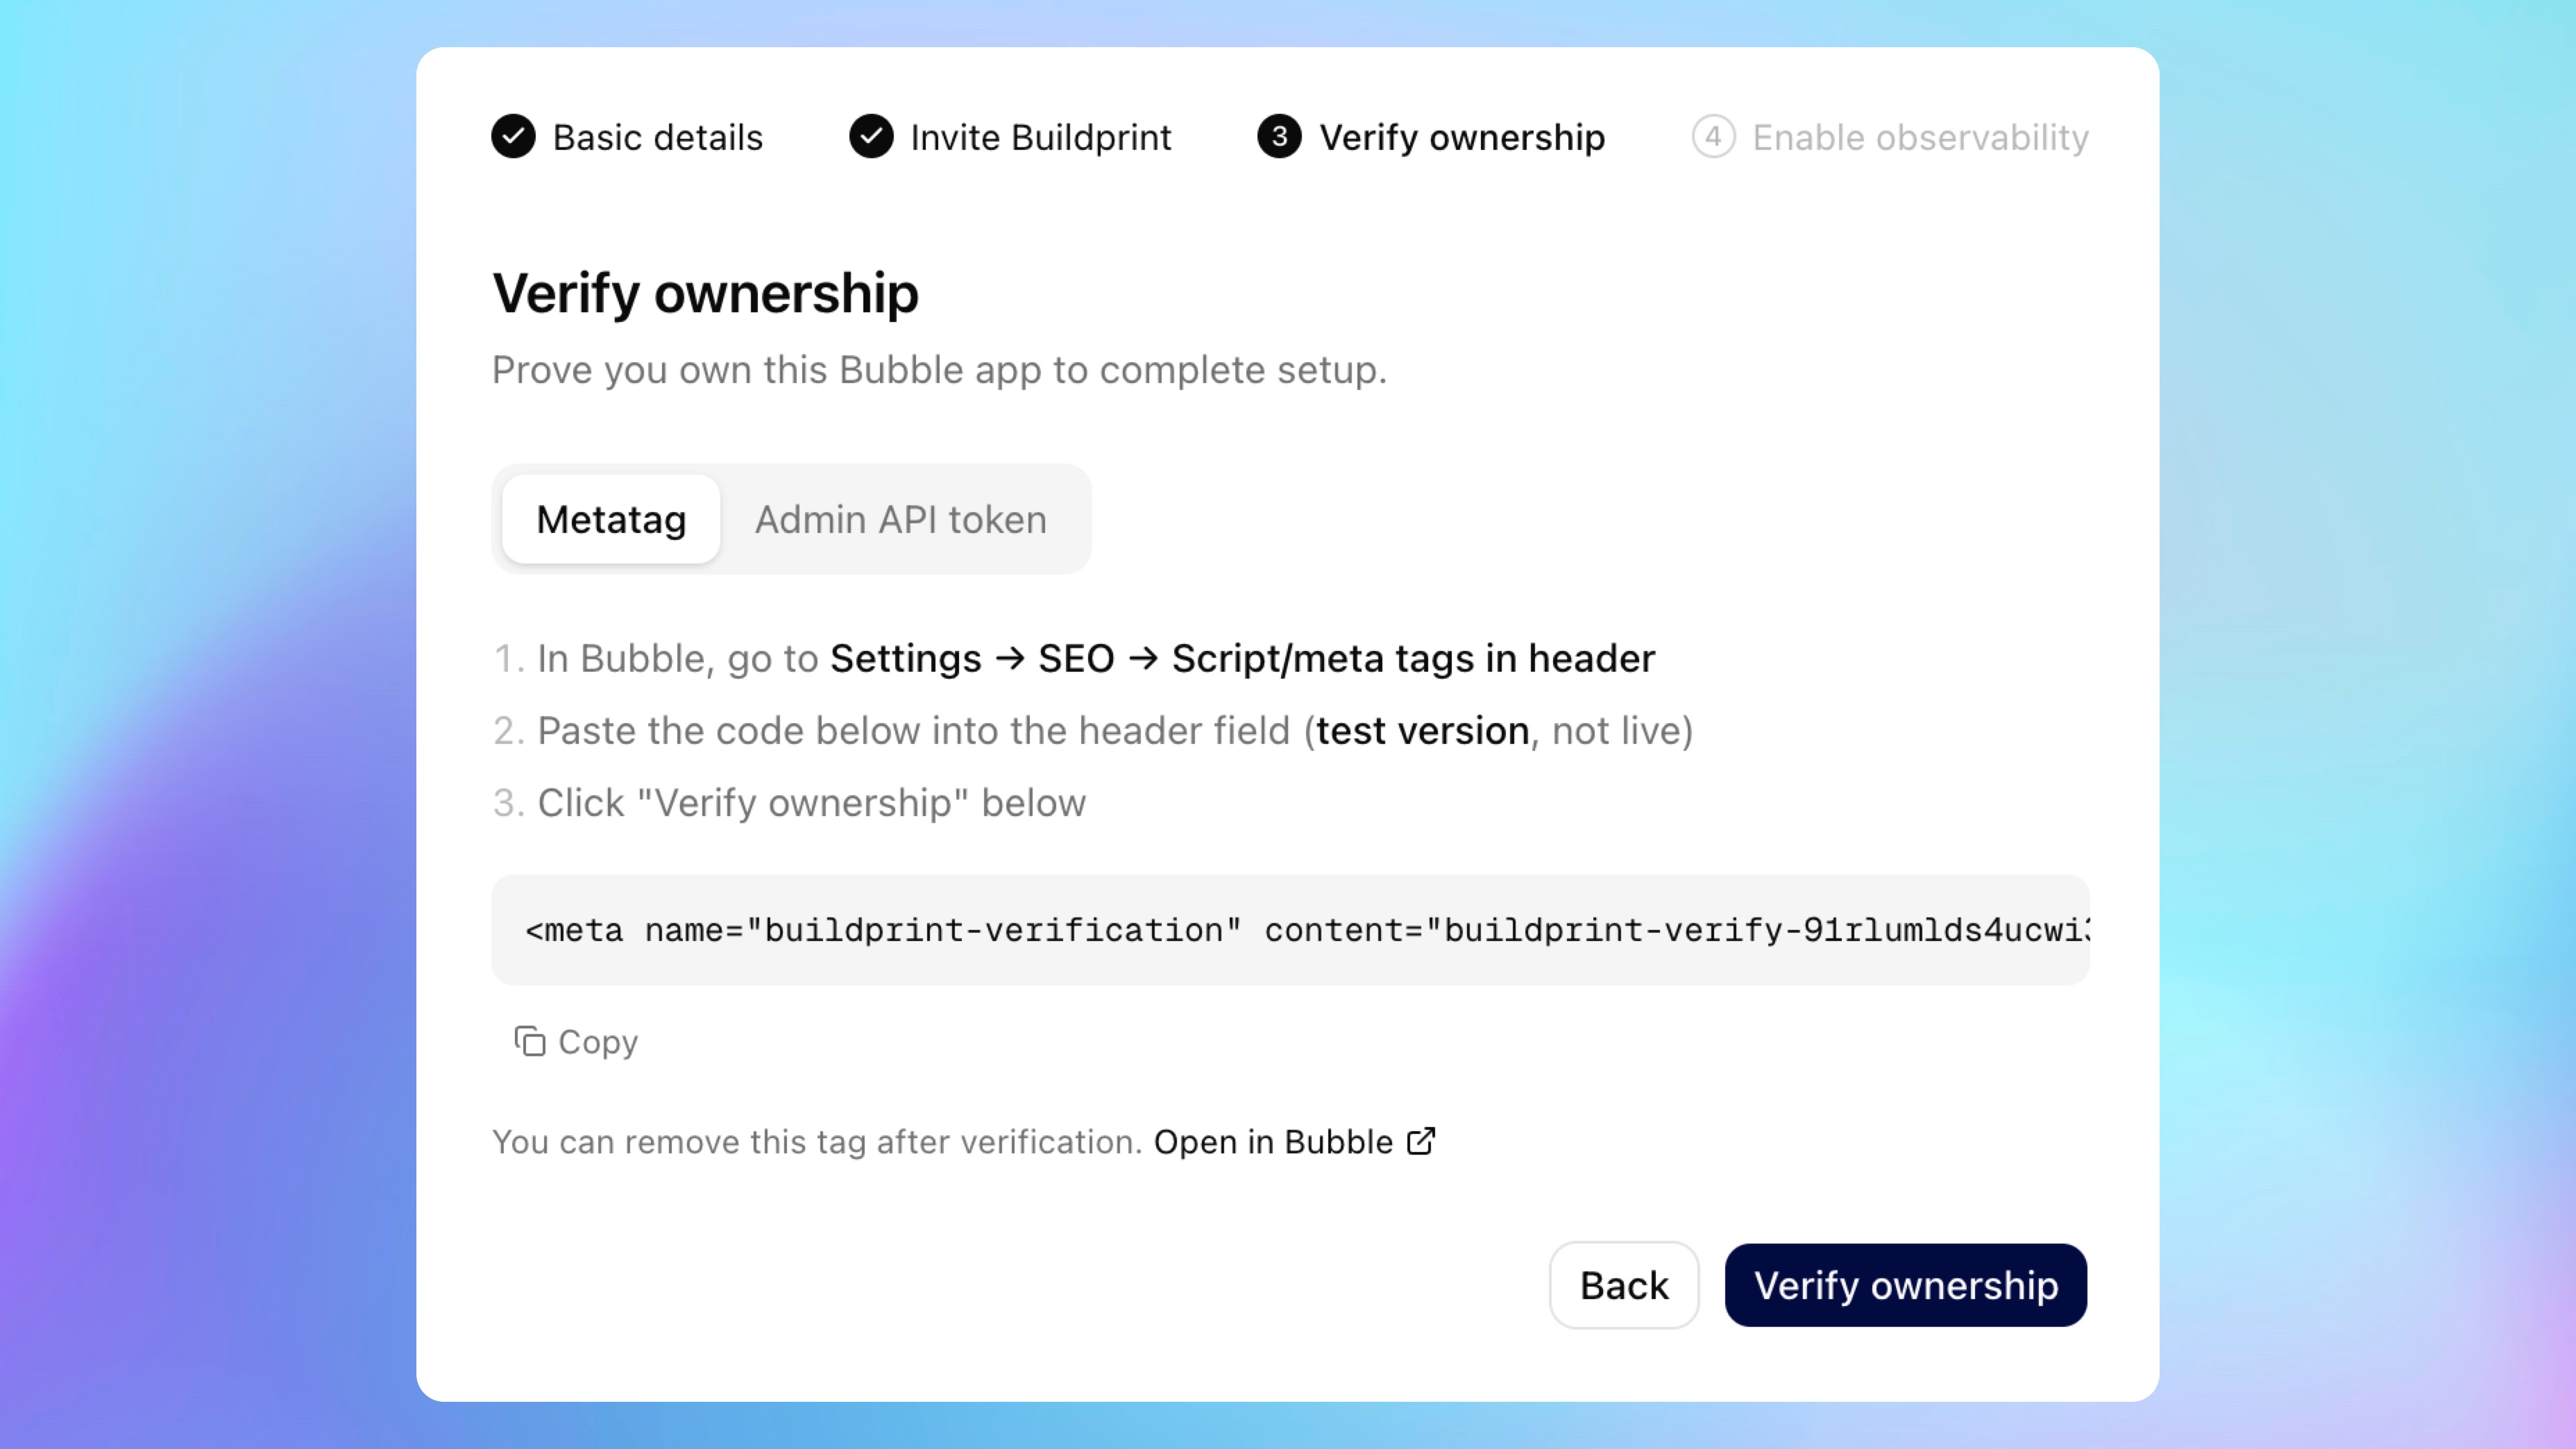
Use this option if you can edit your app's SEO header settings.
In Buildprint, select Metatag.
Copy the verification tag.
In Bubble, go to Settings -> SEO -> Script/meta tags in header.
Paste the tag into the header field for the test version, not live.
Return to Buildprint.
Click Verify ownership.
After ownership has been verified, you can remove the metatag from Bubble.
Option B: Use an Admin API token
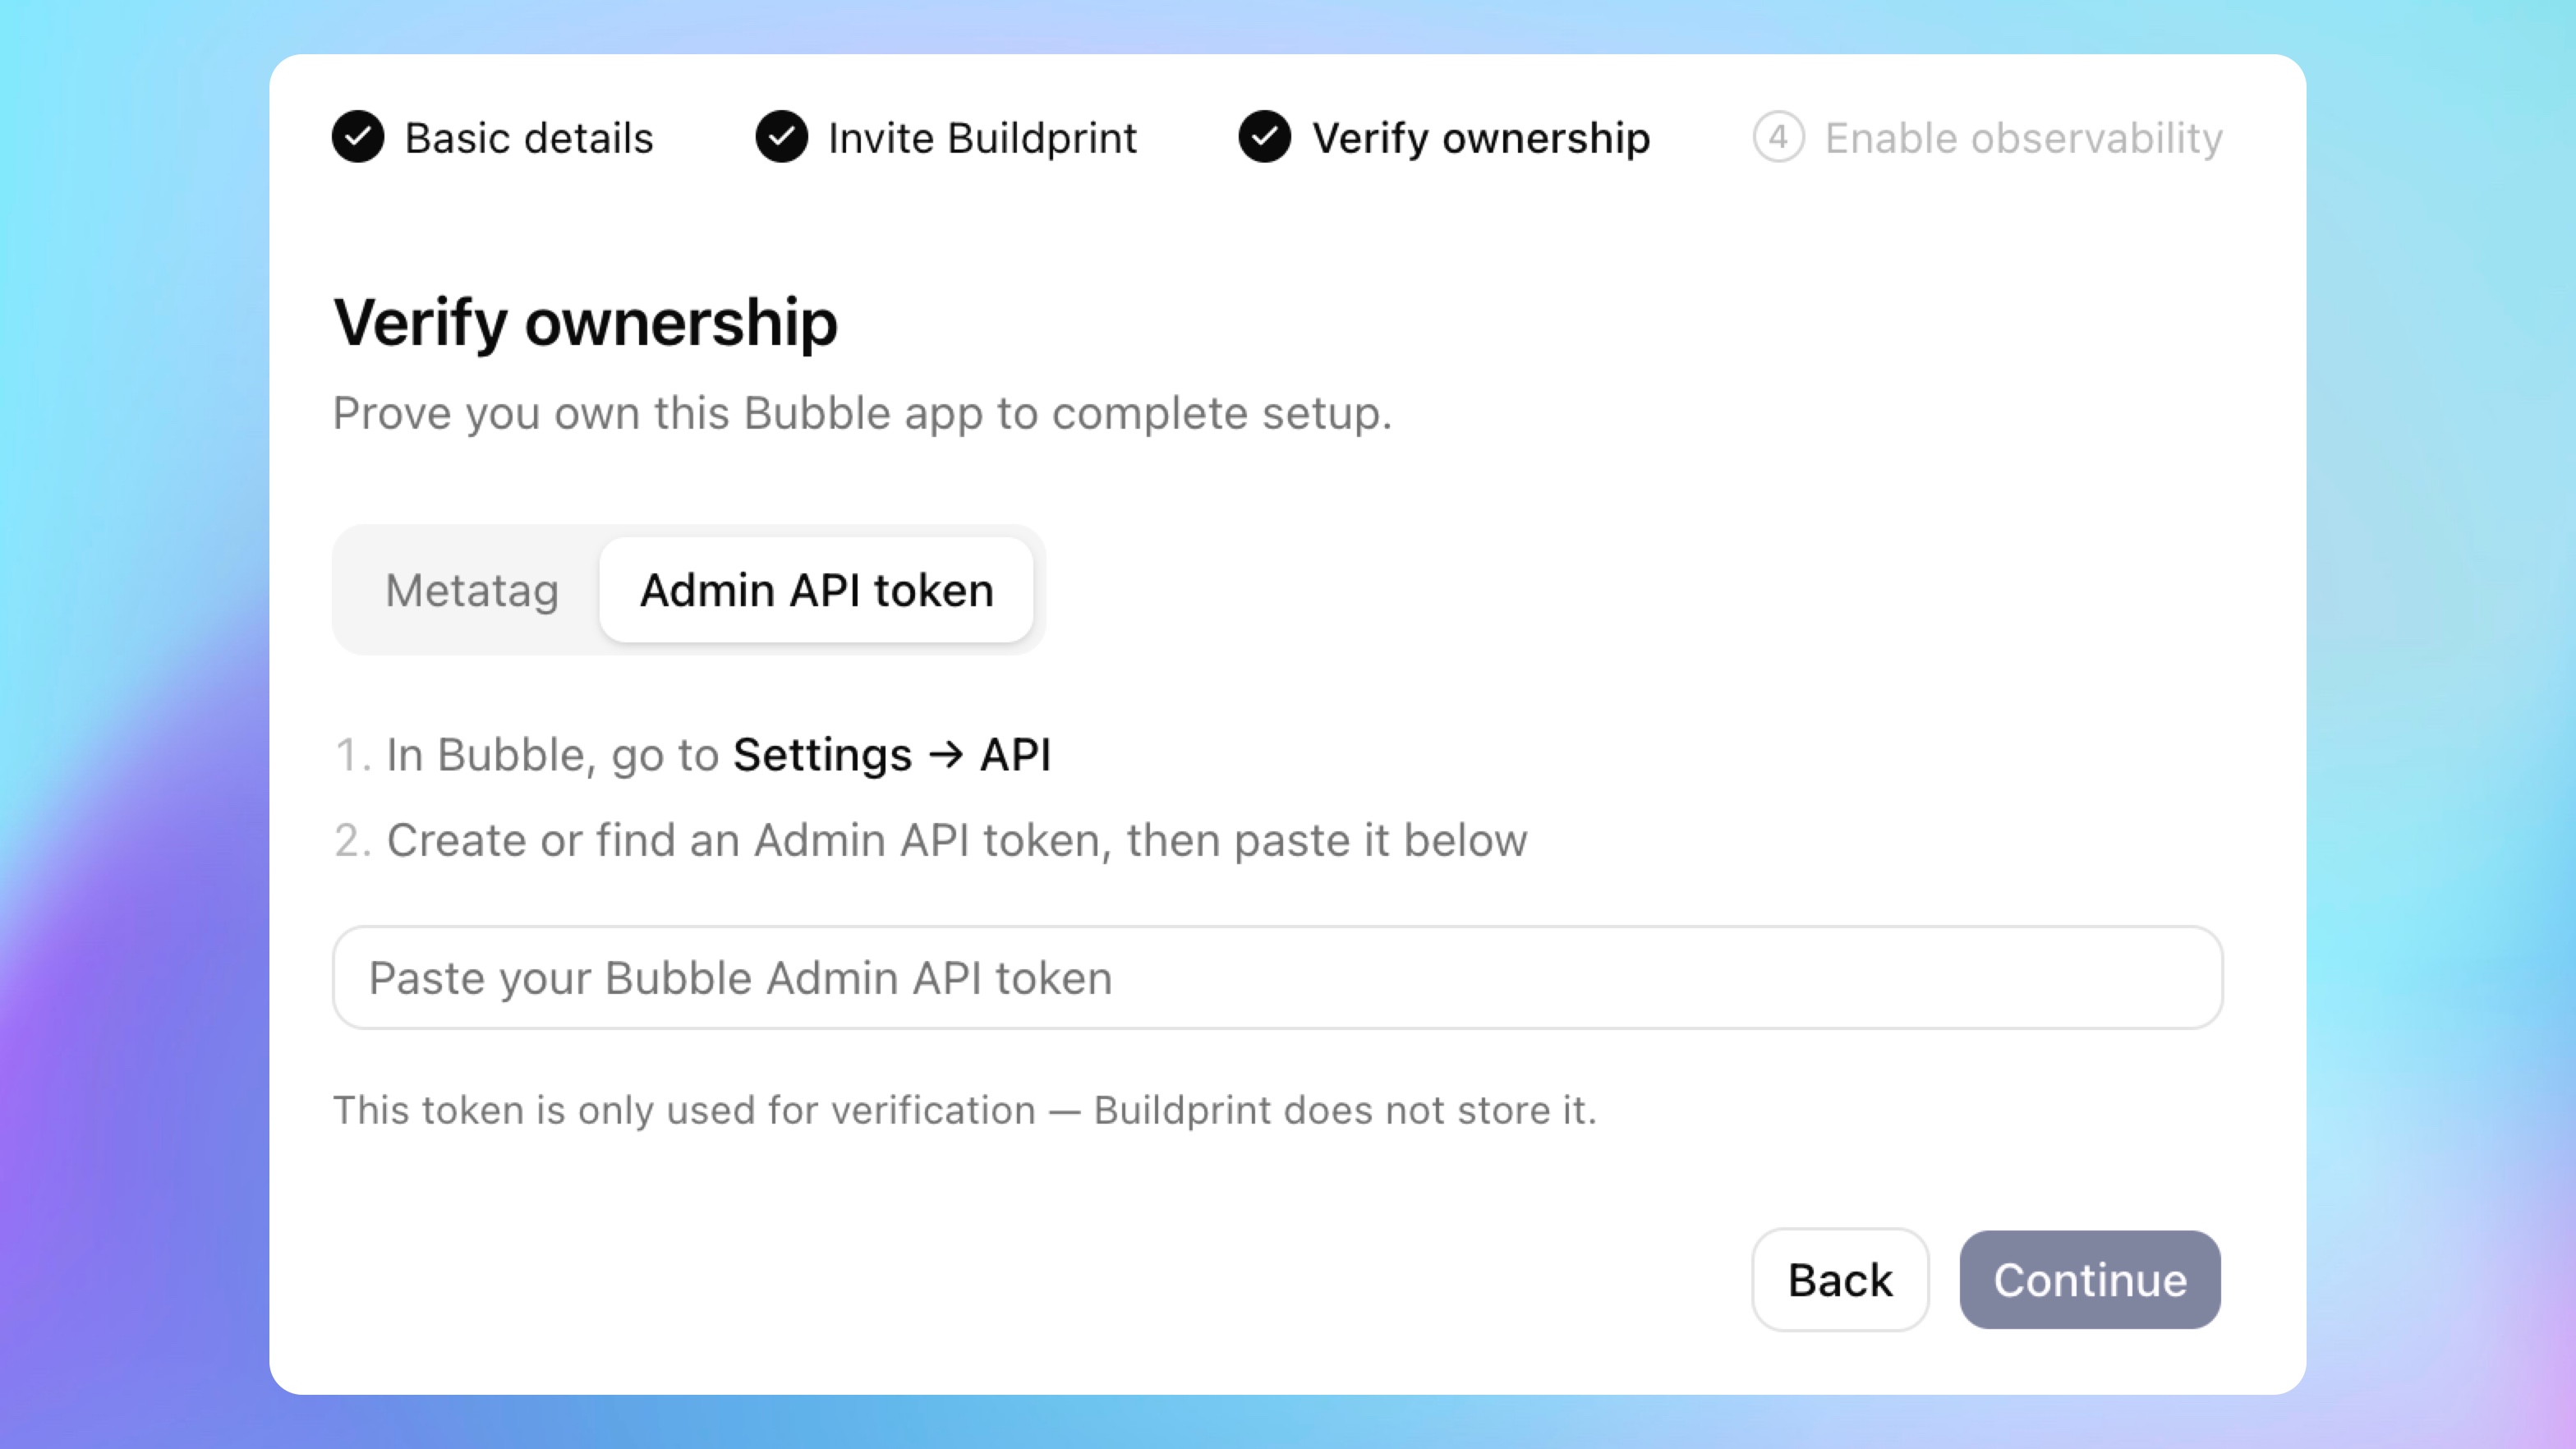
Use this option if you prefer to verify through Bubble's API settings.
In Buildprint, select Admin API token.
In Bubble, go to Settings -> API.
Create or find an Admin API token for this app.
Paste the token into Buildprint.
Click Verify ownership.
Buildprint only uses this token for verification. It is not stored.
Enable observability
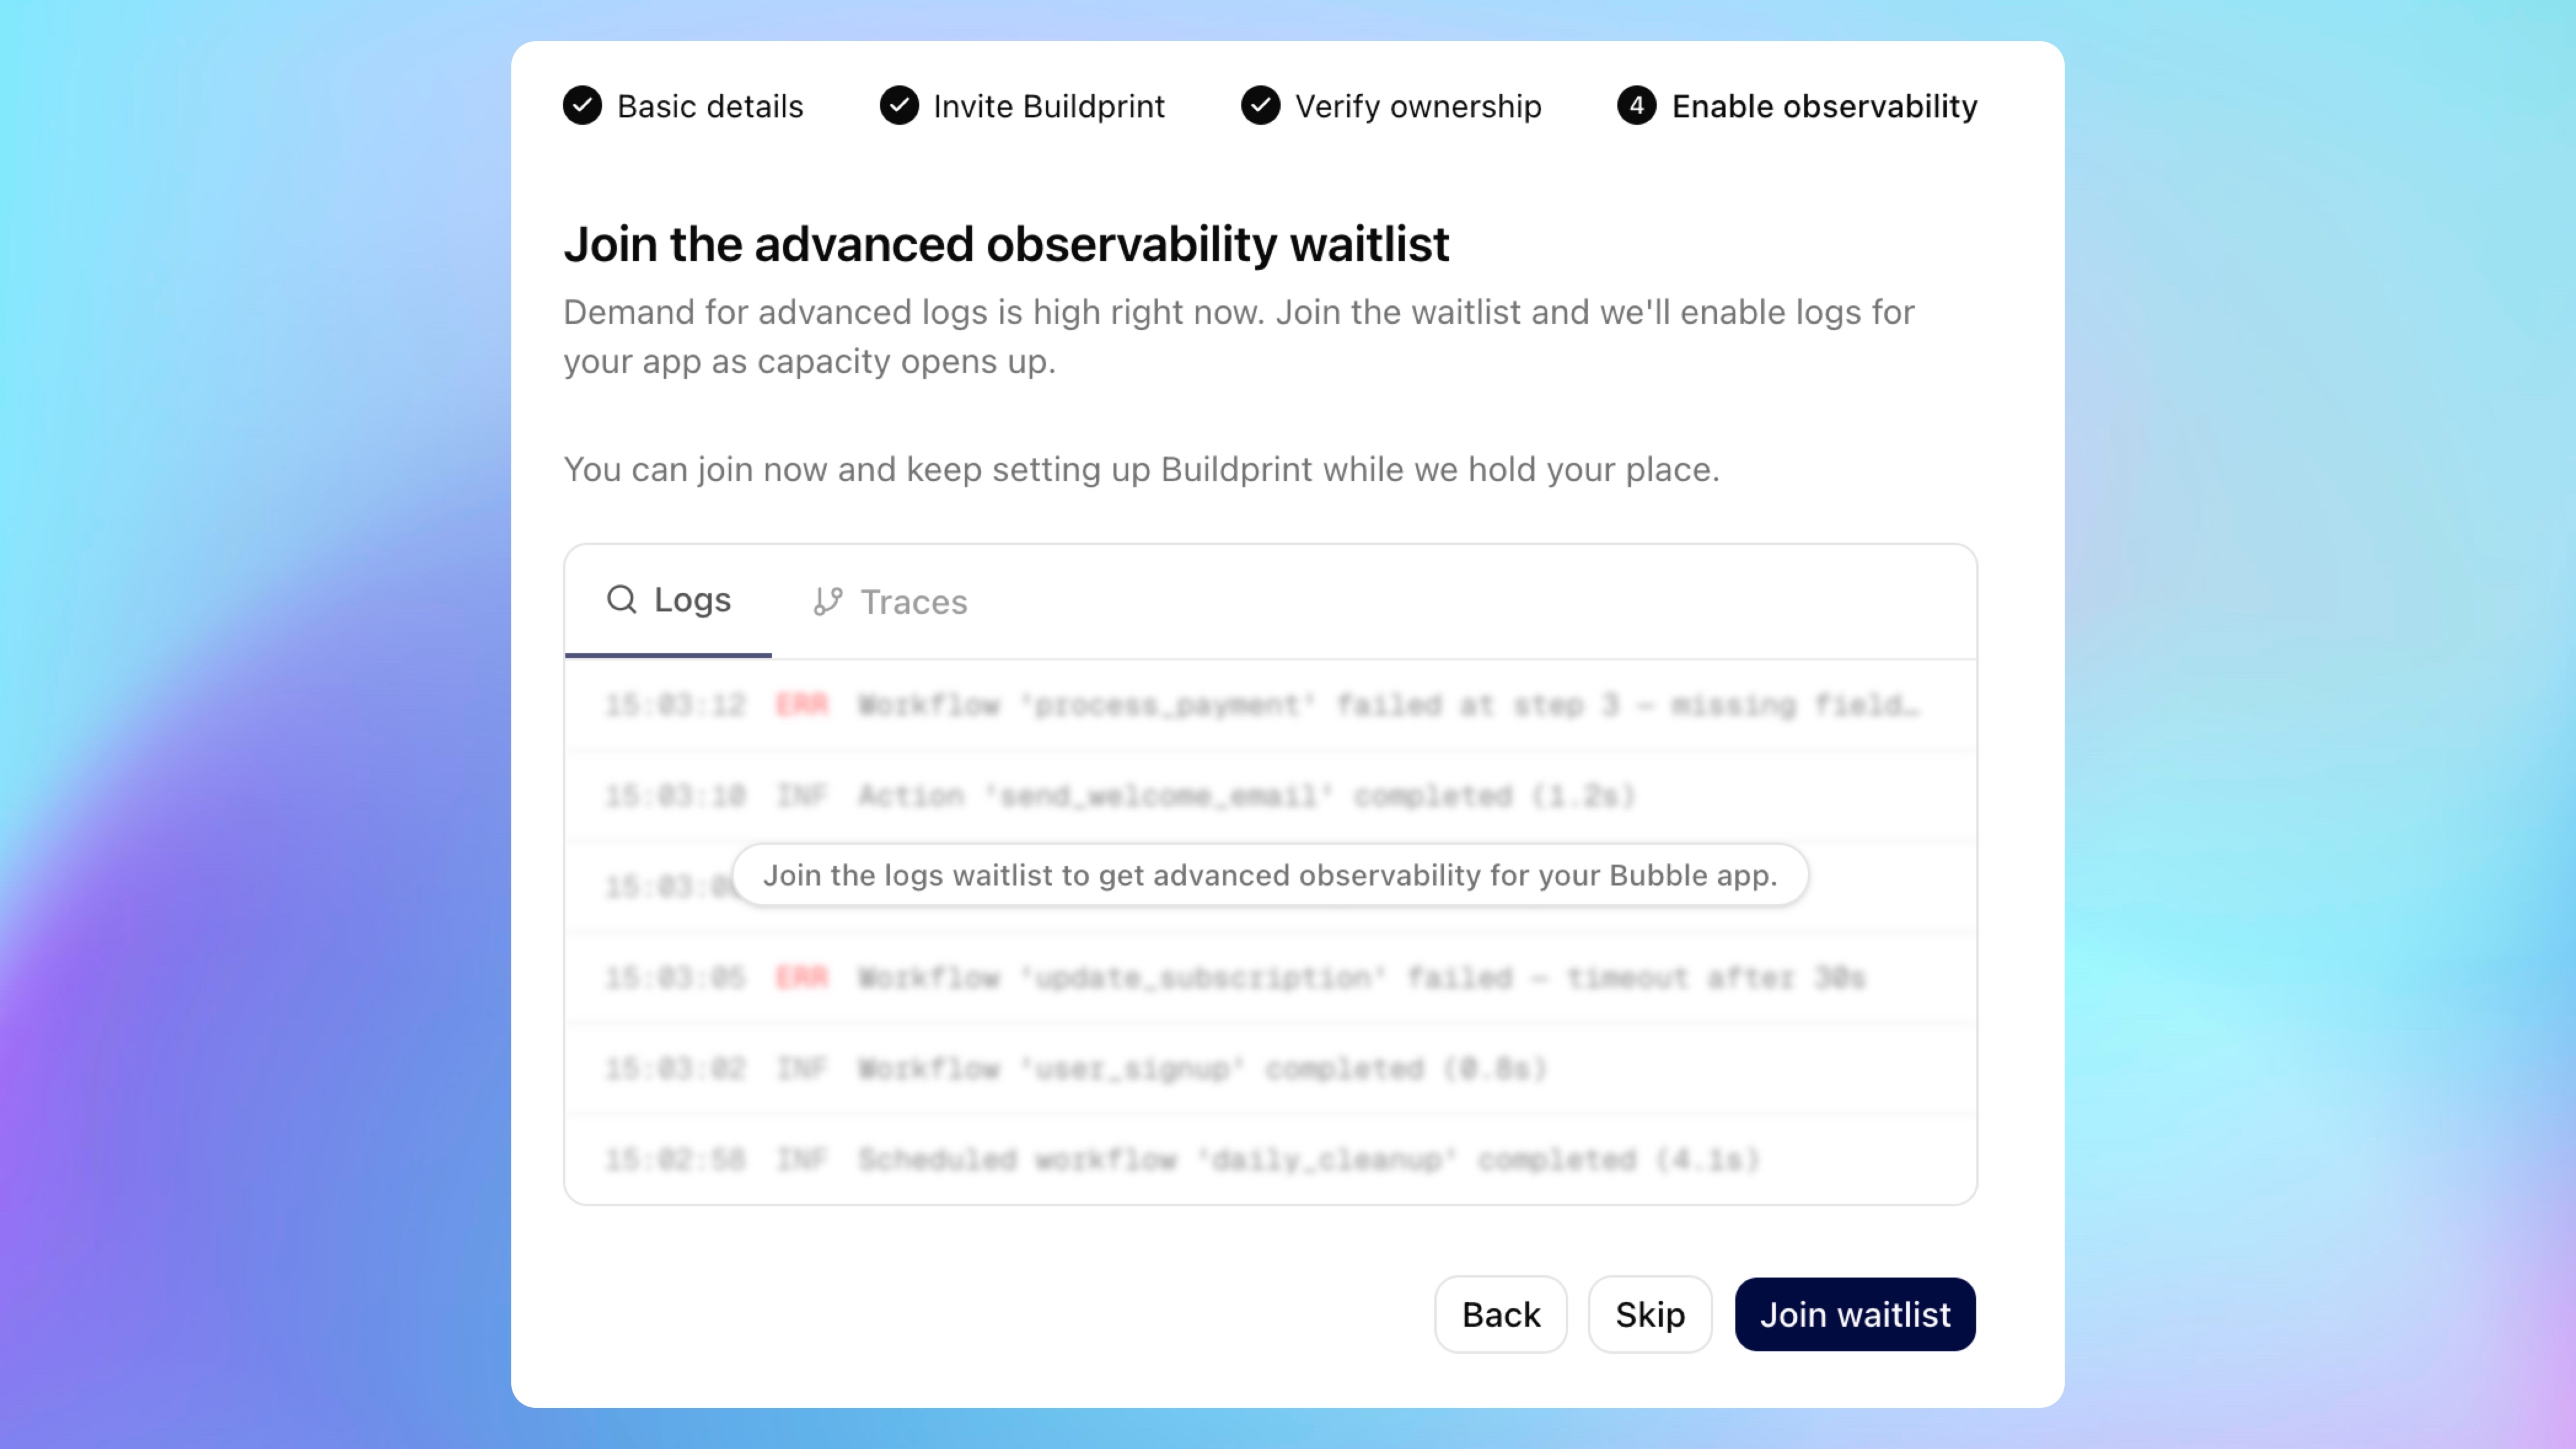
Buildprint may offer advanced observability for logs and traces during setup.
If observability is available, follow the prompts to enable it. If capacity is limited, you can join the waitlist.
Choose one of these options:
Click Join waitlist to save your place for advanced observability.
Click Skip to finish setup without joining the waitlist.
You can continue setting up and using Buildprint either way.
Troubleshooting
Collaborator not found
Confirm the Bubble app ID is correct and that [email protected] was invited to the same Bubble app.
Permission check fails
Grant the needed App, Data, Logs, or Versions access in Bubble, then check again in Buildprint.
Plan check fails
Make sure the Bubble app supports app export.
Metatag verification fails
Paste the tag into the test version header field in Bubble, then try verification again.
Admin API token verification fails
Check that the token is current and belongs to the same Bubble app.