
Check that you invited [email protected] to the correct Bubble app, without typos in the email address. If on a dedicated server, ensure you entered the dedicated server ID in the previous step.
Connect your Bubble app or plugin
Connect a Bubble app or plugin to let Buildprint understand its structure and help you work on it. You will complete the setup in Buildprint and Bubble.
Buildprint works on any paid Bubble plan, and bypasses collaborator limits.
Before you start
You need access to the Bubble app or plugin you want to connect.
For an app, you need its Bubble App ID and permission to add a collaborator.
For a plugin, you need its Bubble plugin editor URL and permission to add a collaborator.
To verify an app, you also need permission to edit its SEO settings or create an Admin API token.
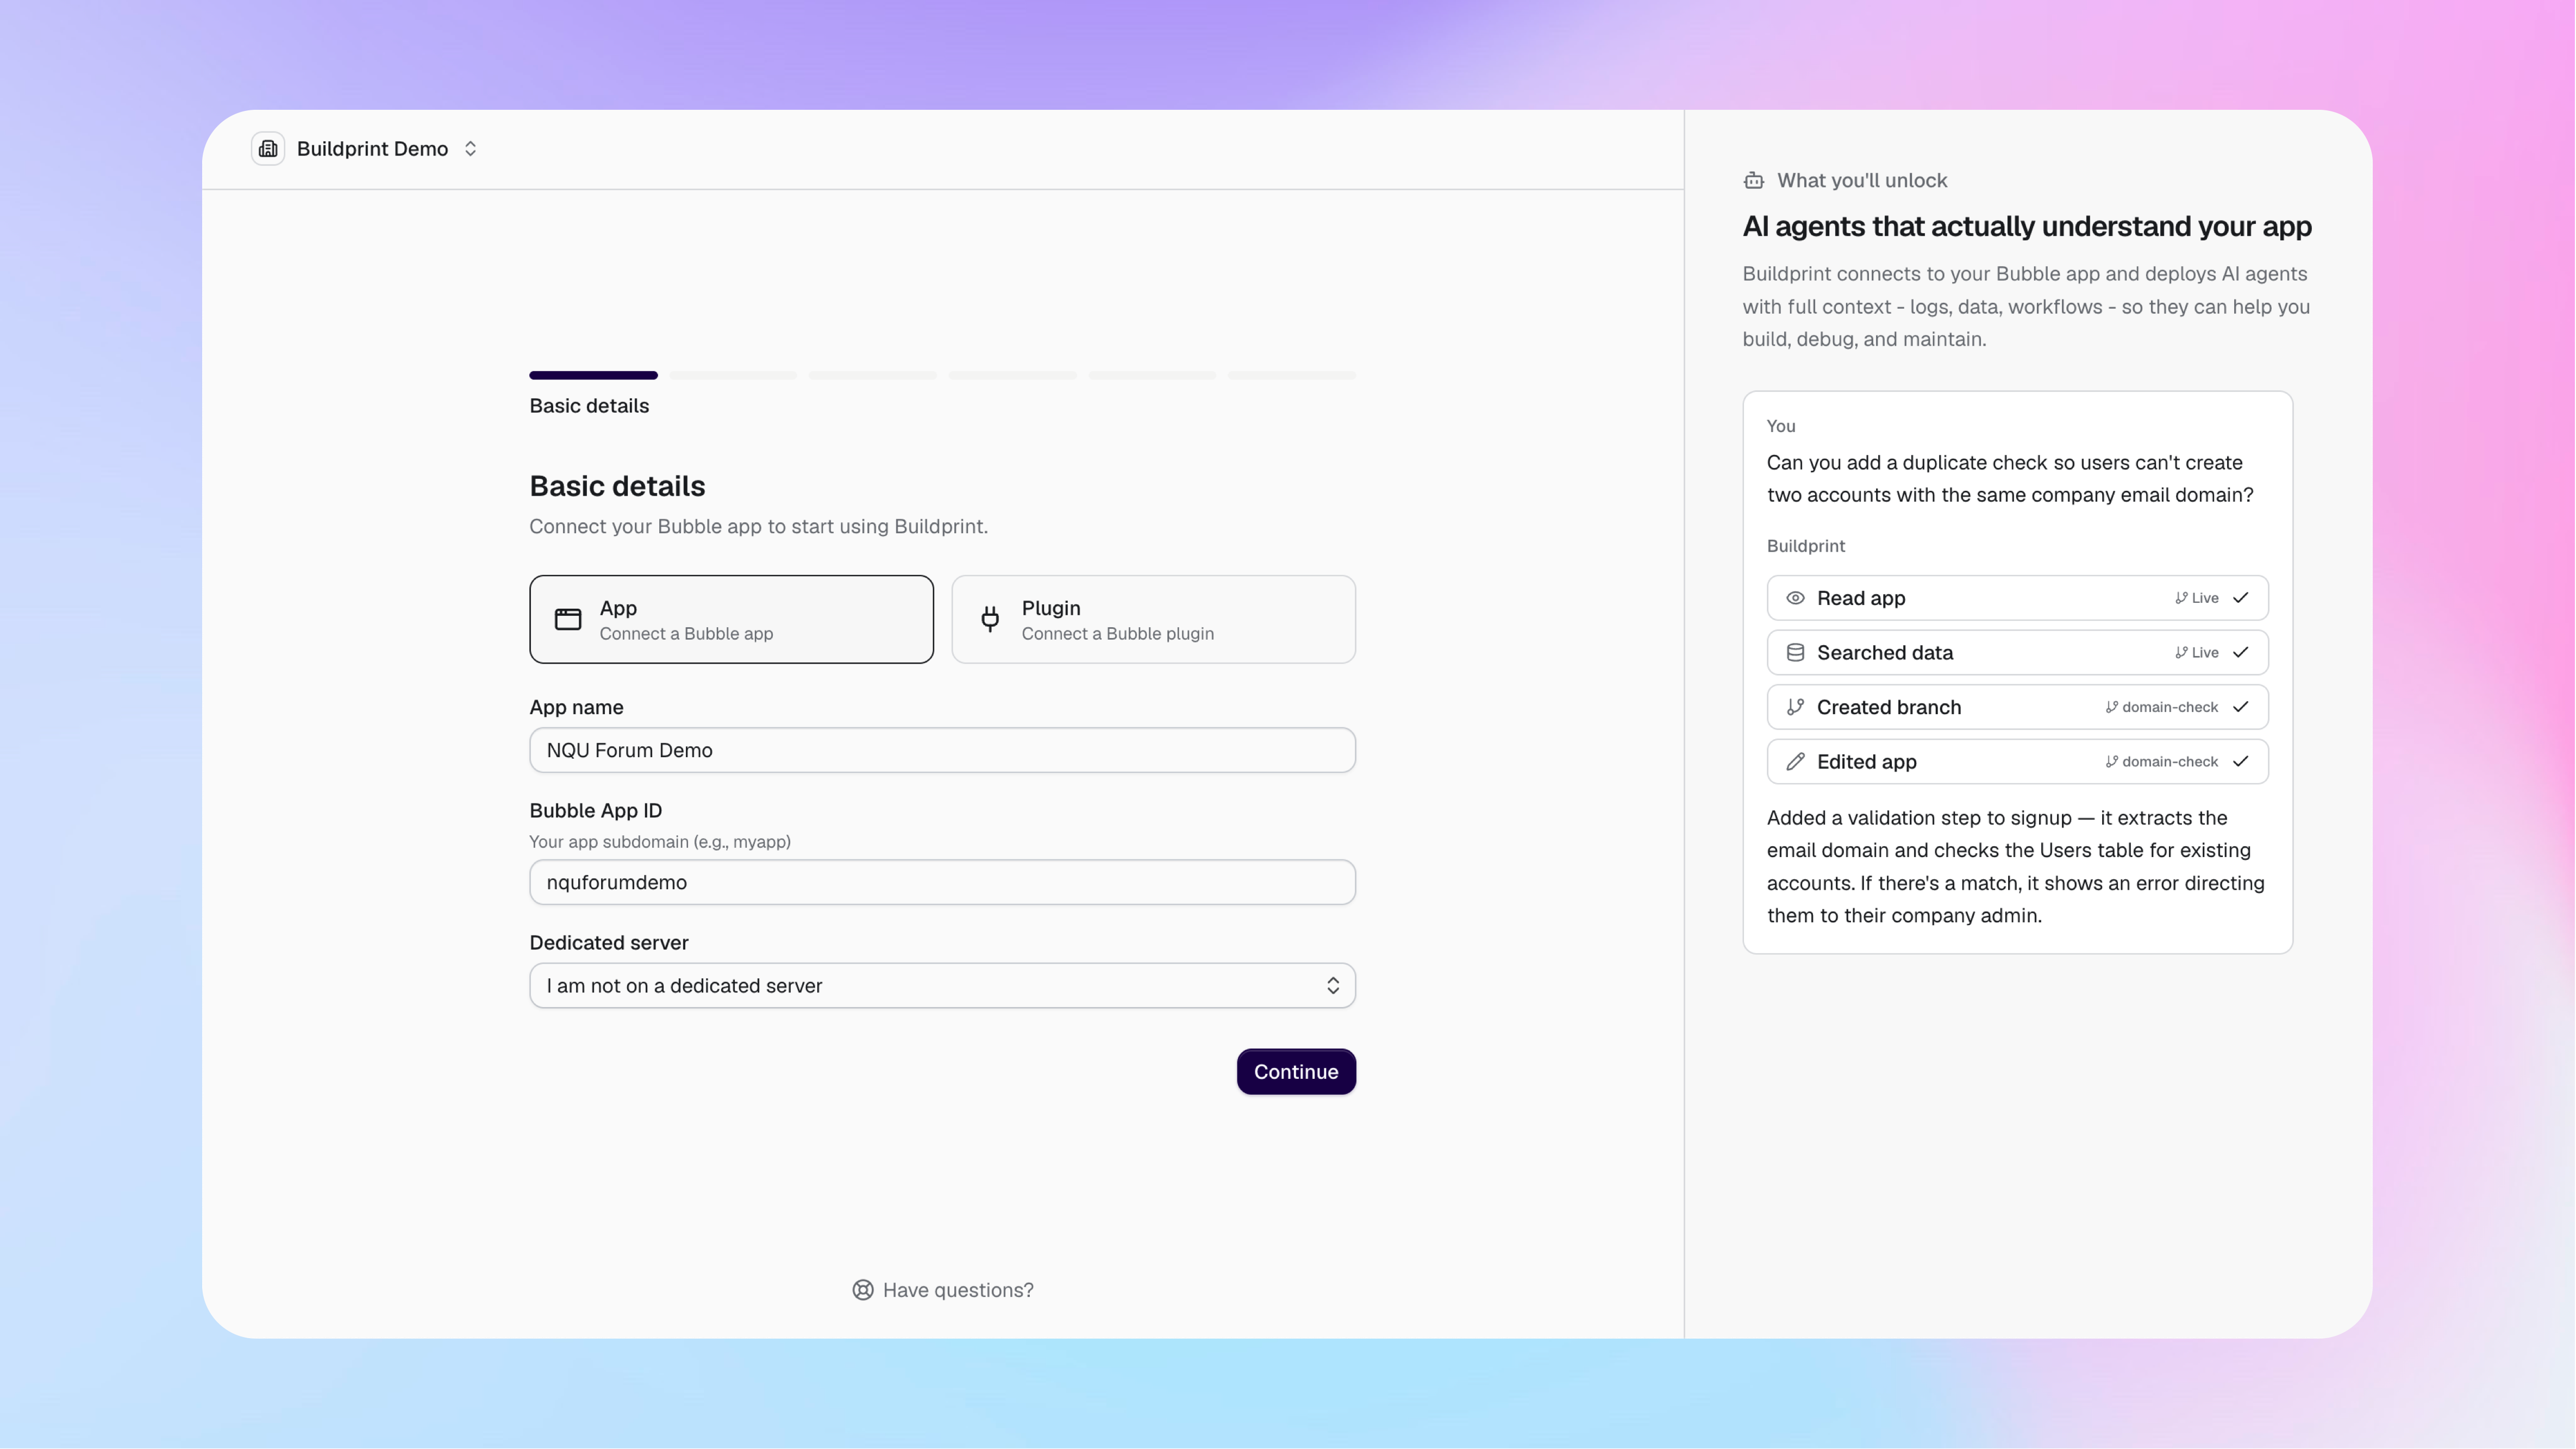
Enter the project details
Choose whether you are connecting a Bubble app or a Bubble plugin.
Select App or Plugin.
Enter a name for the project in Buildprint.
For an app, enter its Bubble App ID. This is the app subdomain that appears before
.bubbleapps.io, such asmyappinmyapp.bubbleapps.io, not the full URL. You will see an error if the ID is invalid.If the app uses a Bubble dedicated server, select it and enter the dedicated server ID.
For a plugin, enter its full Bubble plugin editor URL.
Click Continue.
Invite Buildprint
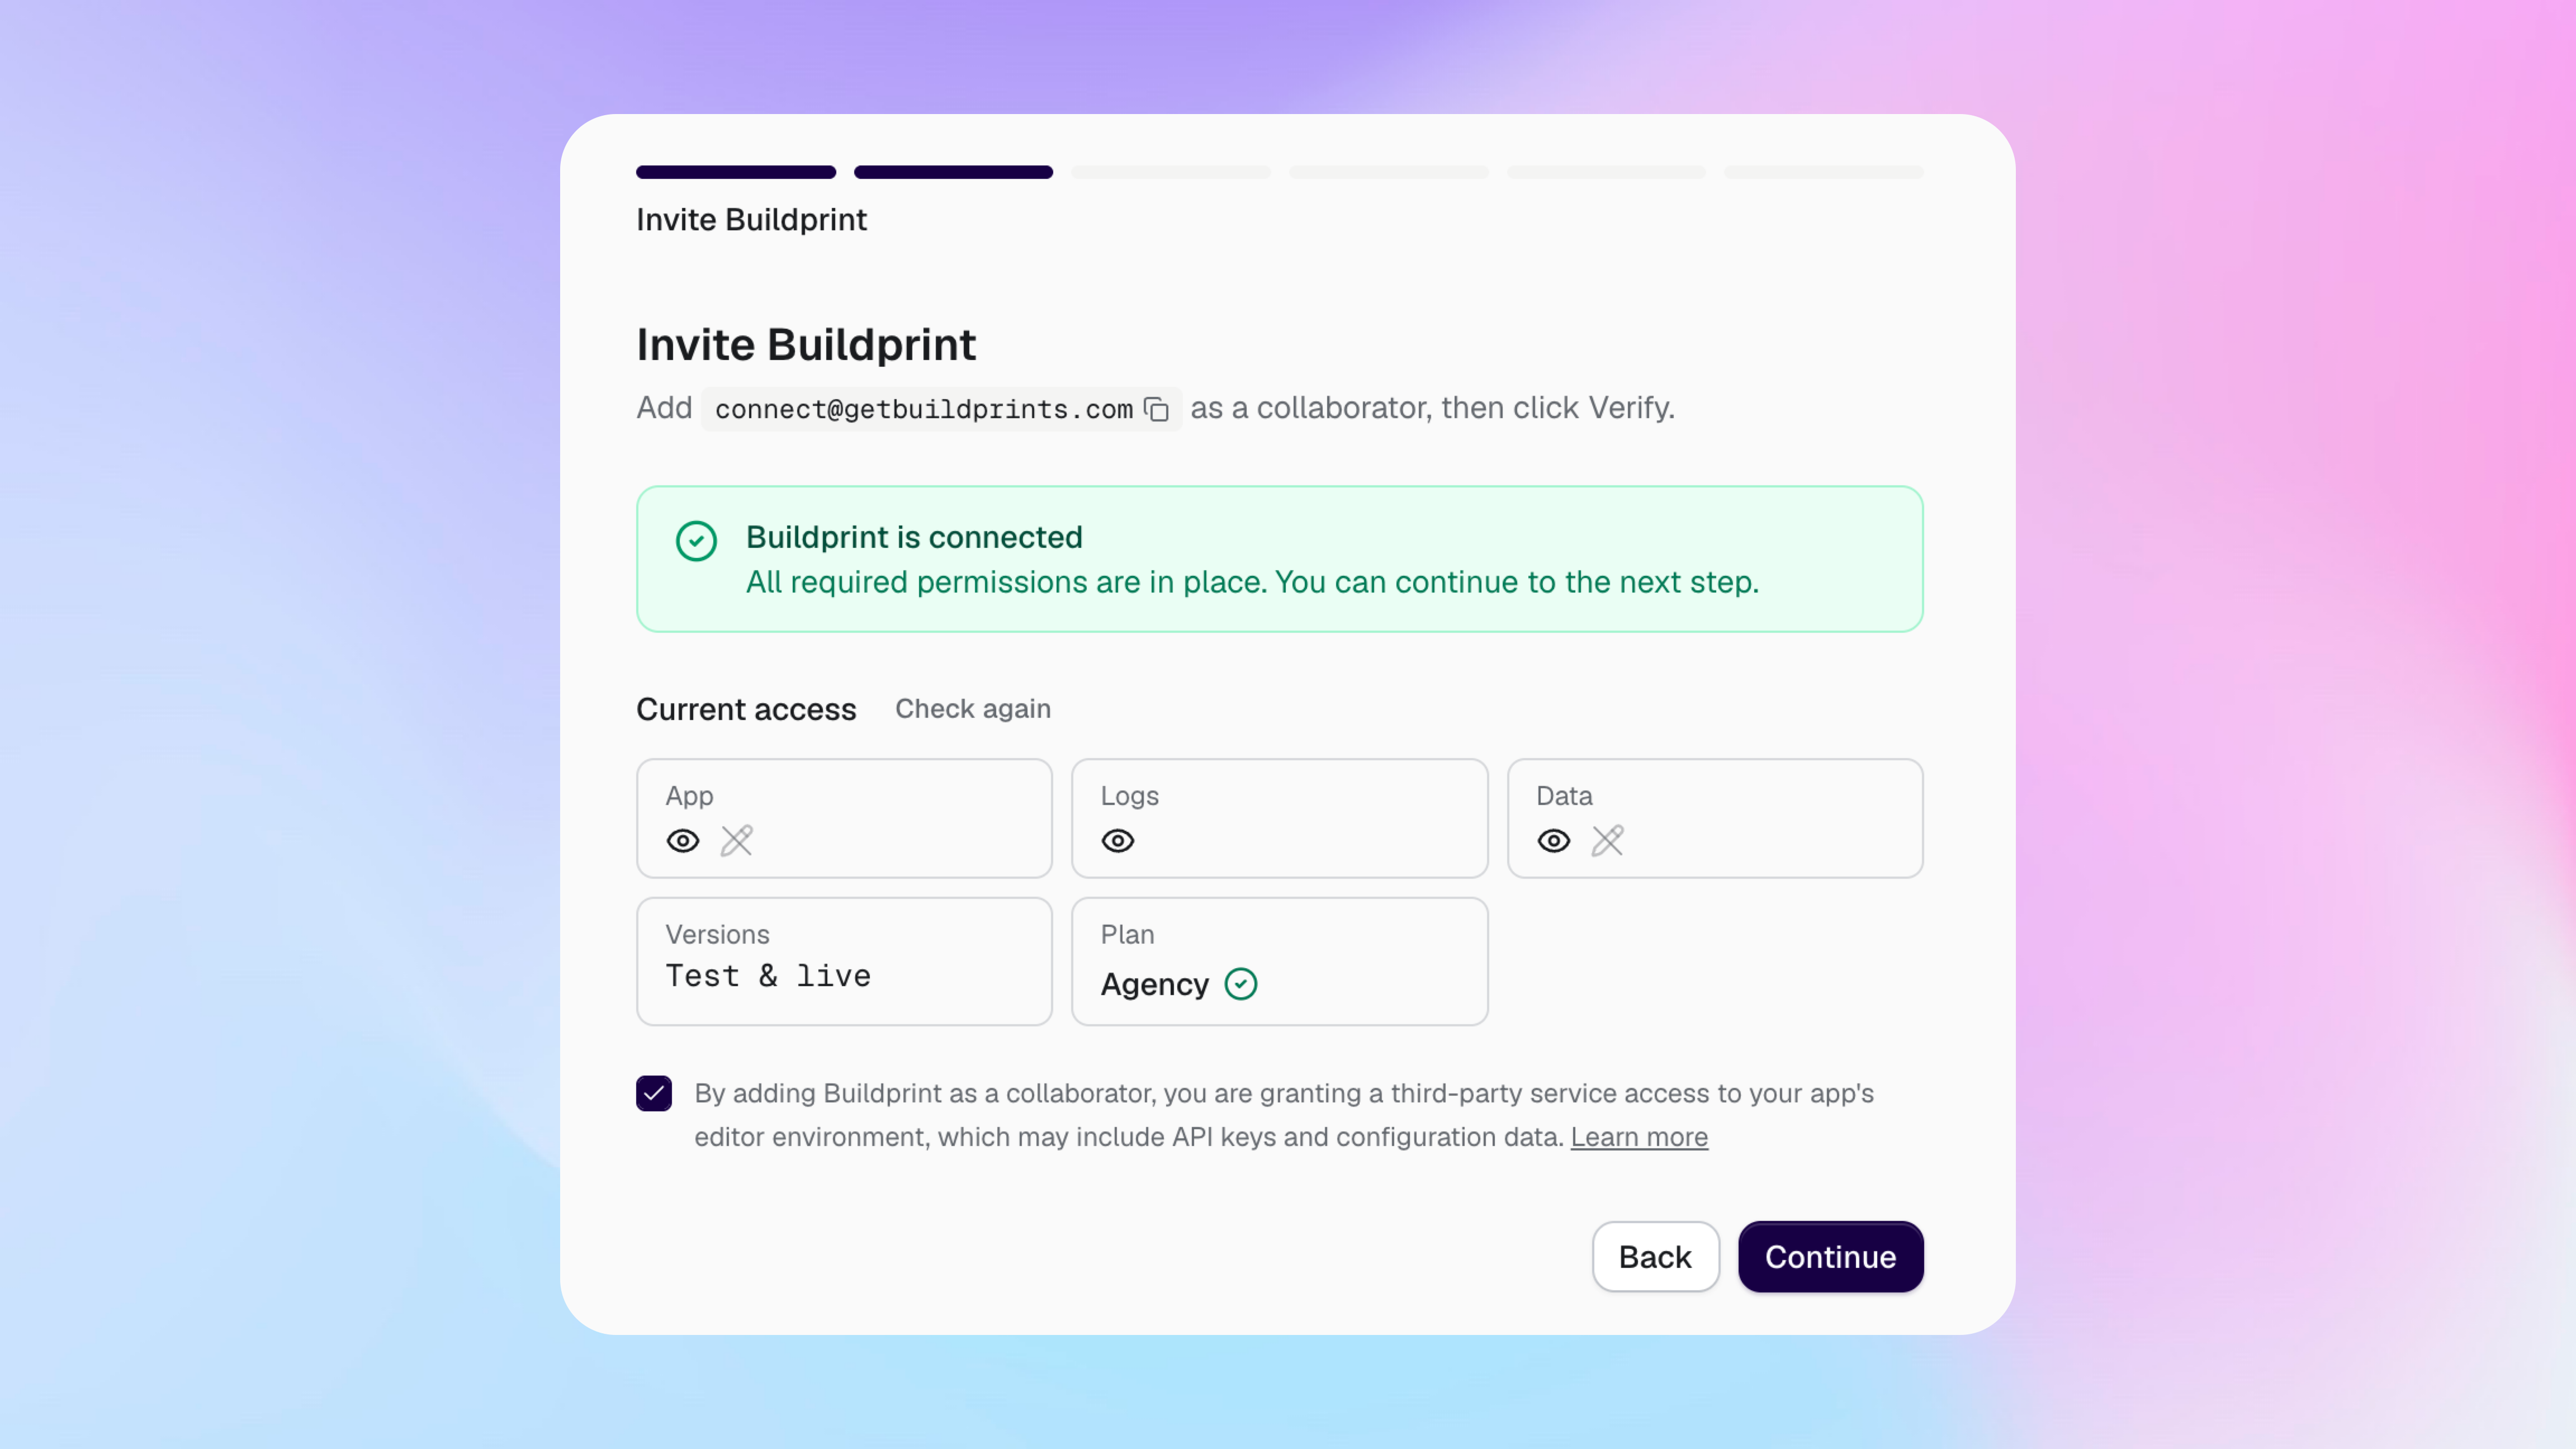
Adding Buildprint as a Bubble collaborator lets Buildprint read the parts of your project that you allow.
Open the app or plugin in Bubble.
Add
[email protected]as a collaborator.Choose the Bubble permissions Buildprint needs.
Return to Buildprint and check the connection.
Review the access shown for the app, logs, data, and Bubble versions.
Accept the access notice, then click Continue.
The permissions you choose in Bubble control what Buildprint can access. Buildprint cannot use a feature if the required Bubble permission is missing.
Verify ownership
Ownership verification confirms that you control the Bubble project.
Verify a Bubble app
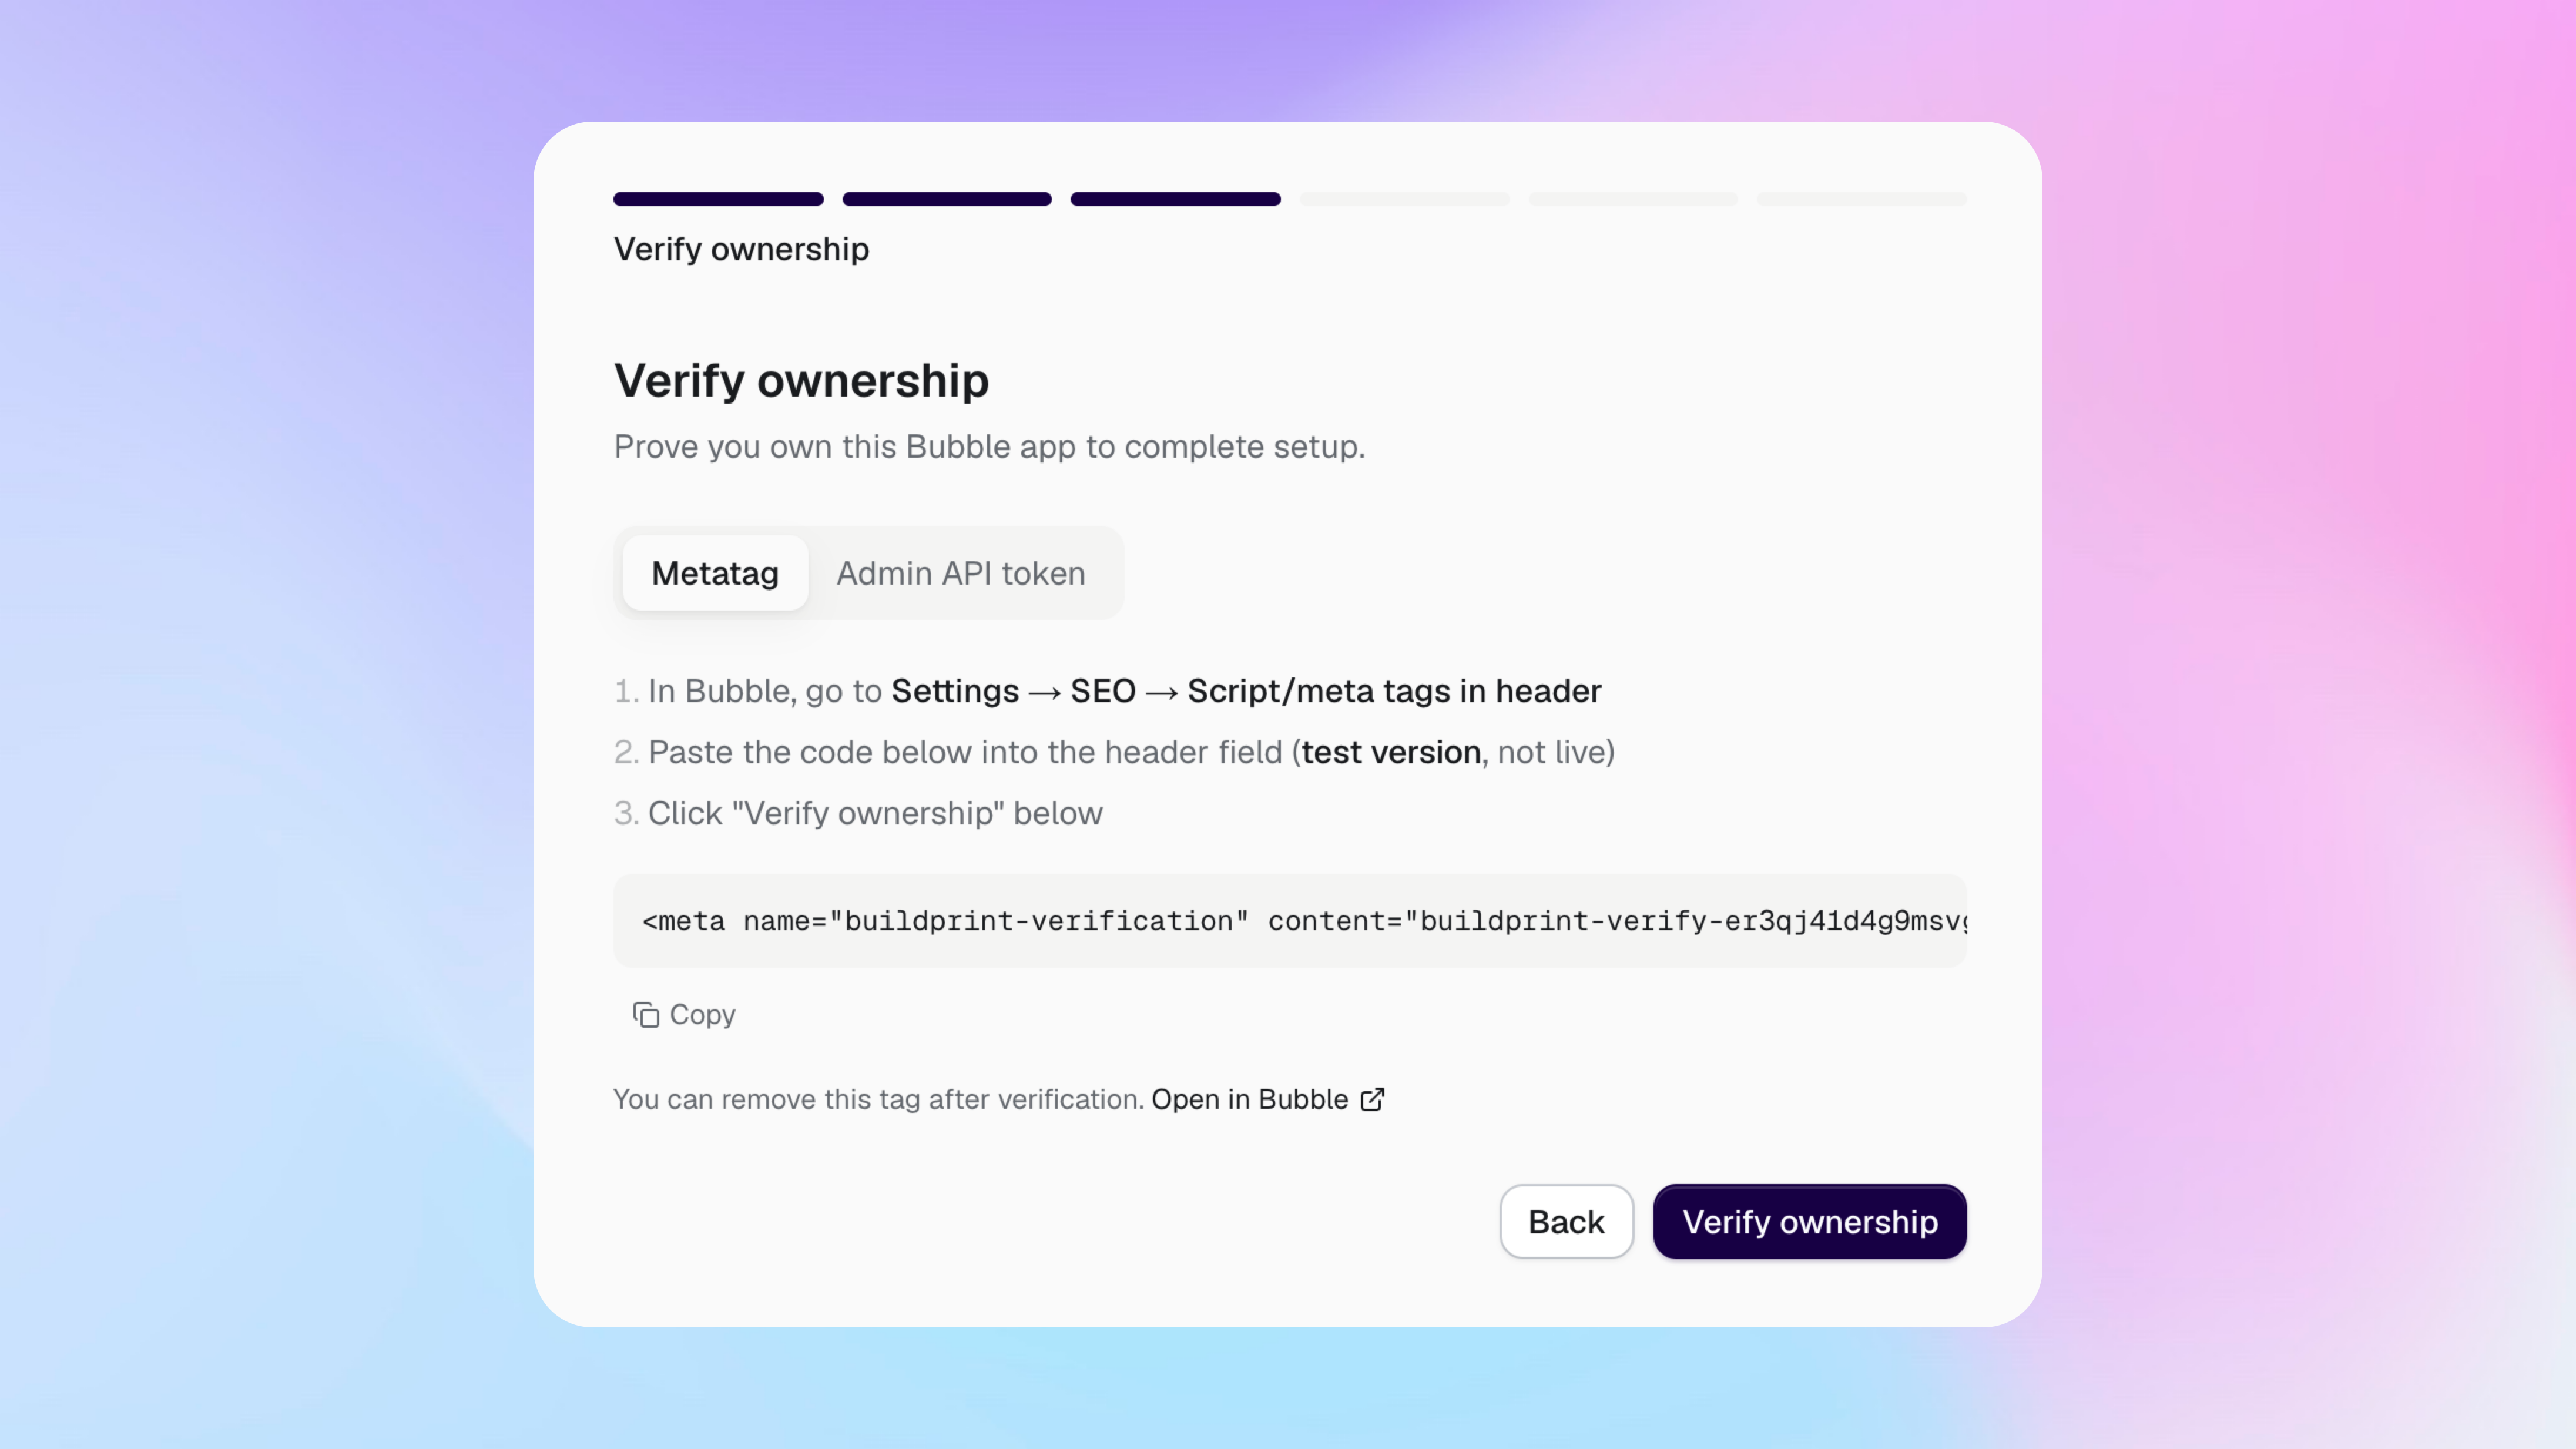
Use the metatag method unless you prefer to verify with a Bubble Admin API token.
On the Verify ownership step, keep Metatag selected.
Copy the verification tag.
In Bubble, go to Settings → SEO → Script/meta tags in header.
Paste the tag into the header field for the test version, not the live version.
Return to Buildprint and click Verify ownership.
You can remove the metatag after verification.
To use the other method, select Admin API token and follow the instructions shown in Buildprint. Buildprint uses the token for verification and does not store it.
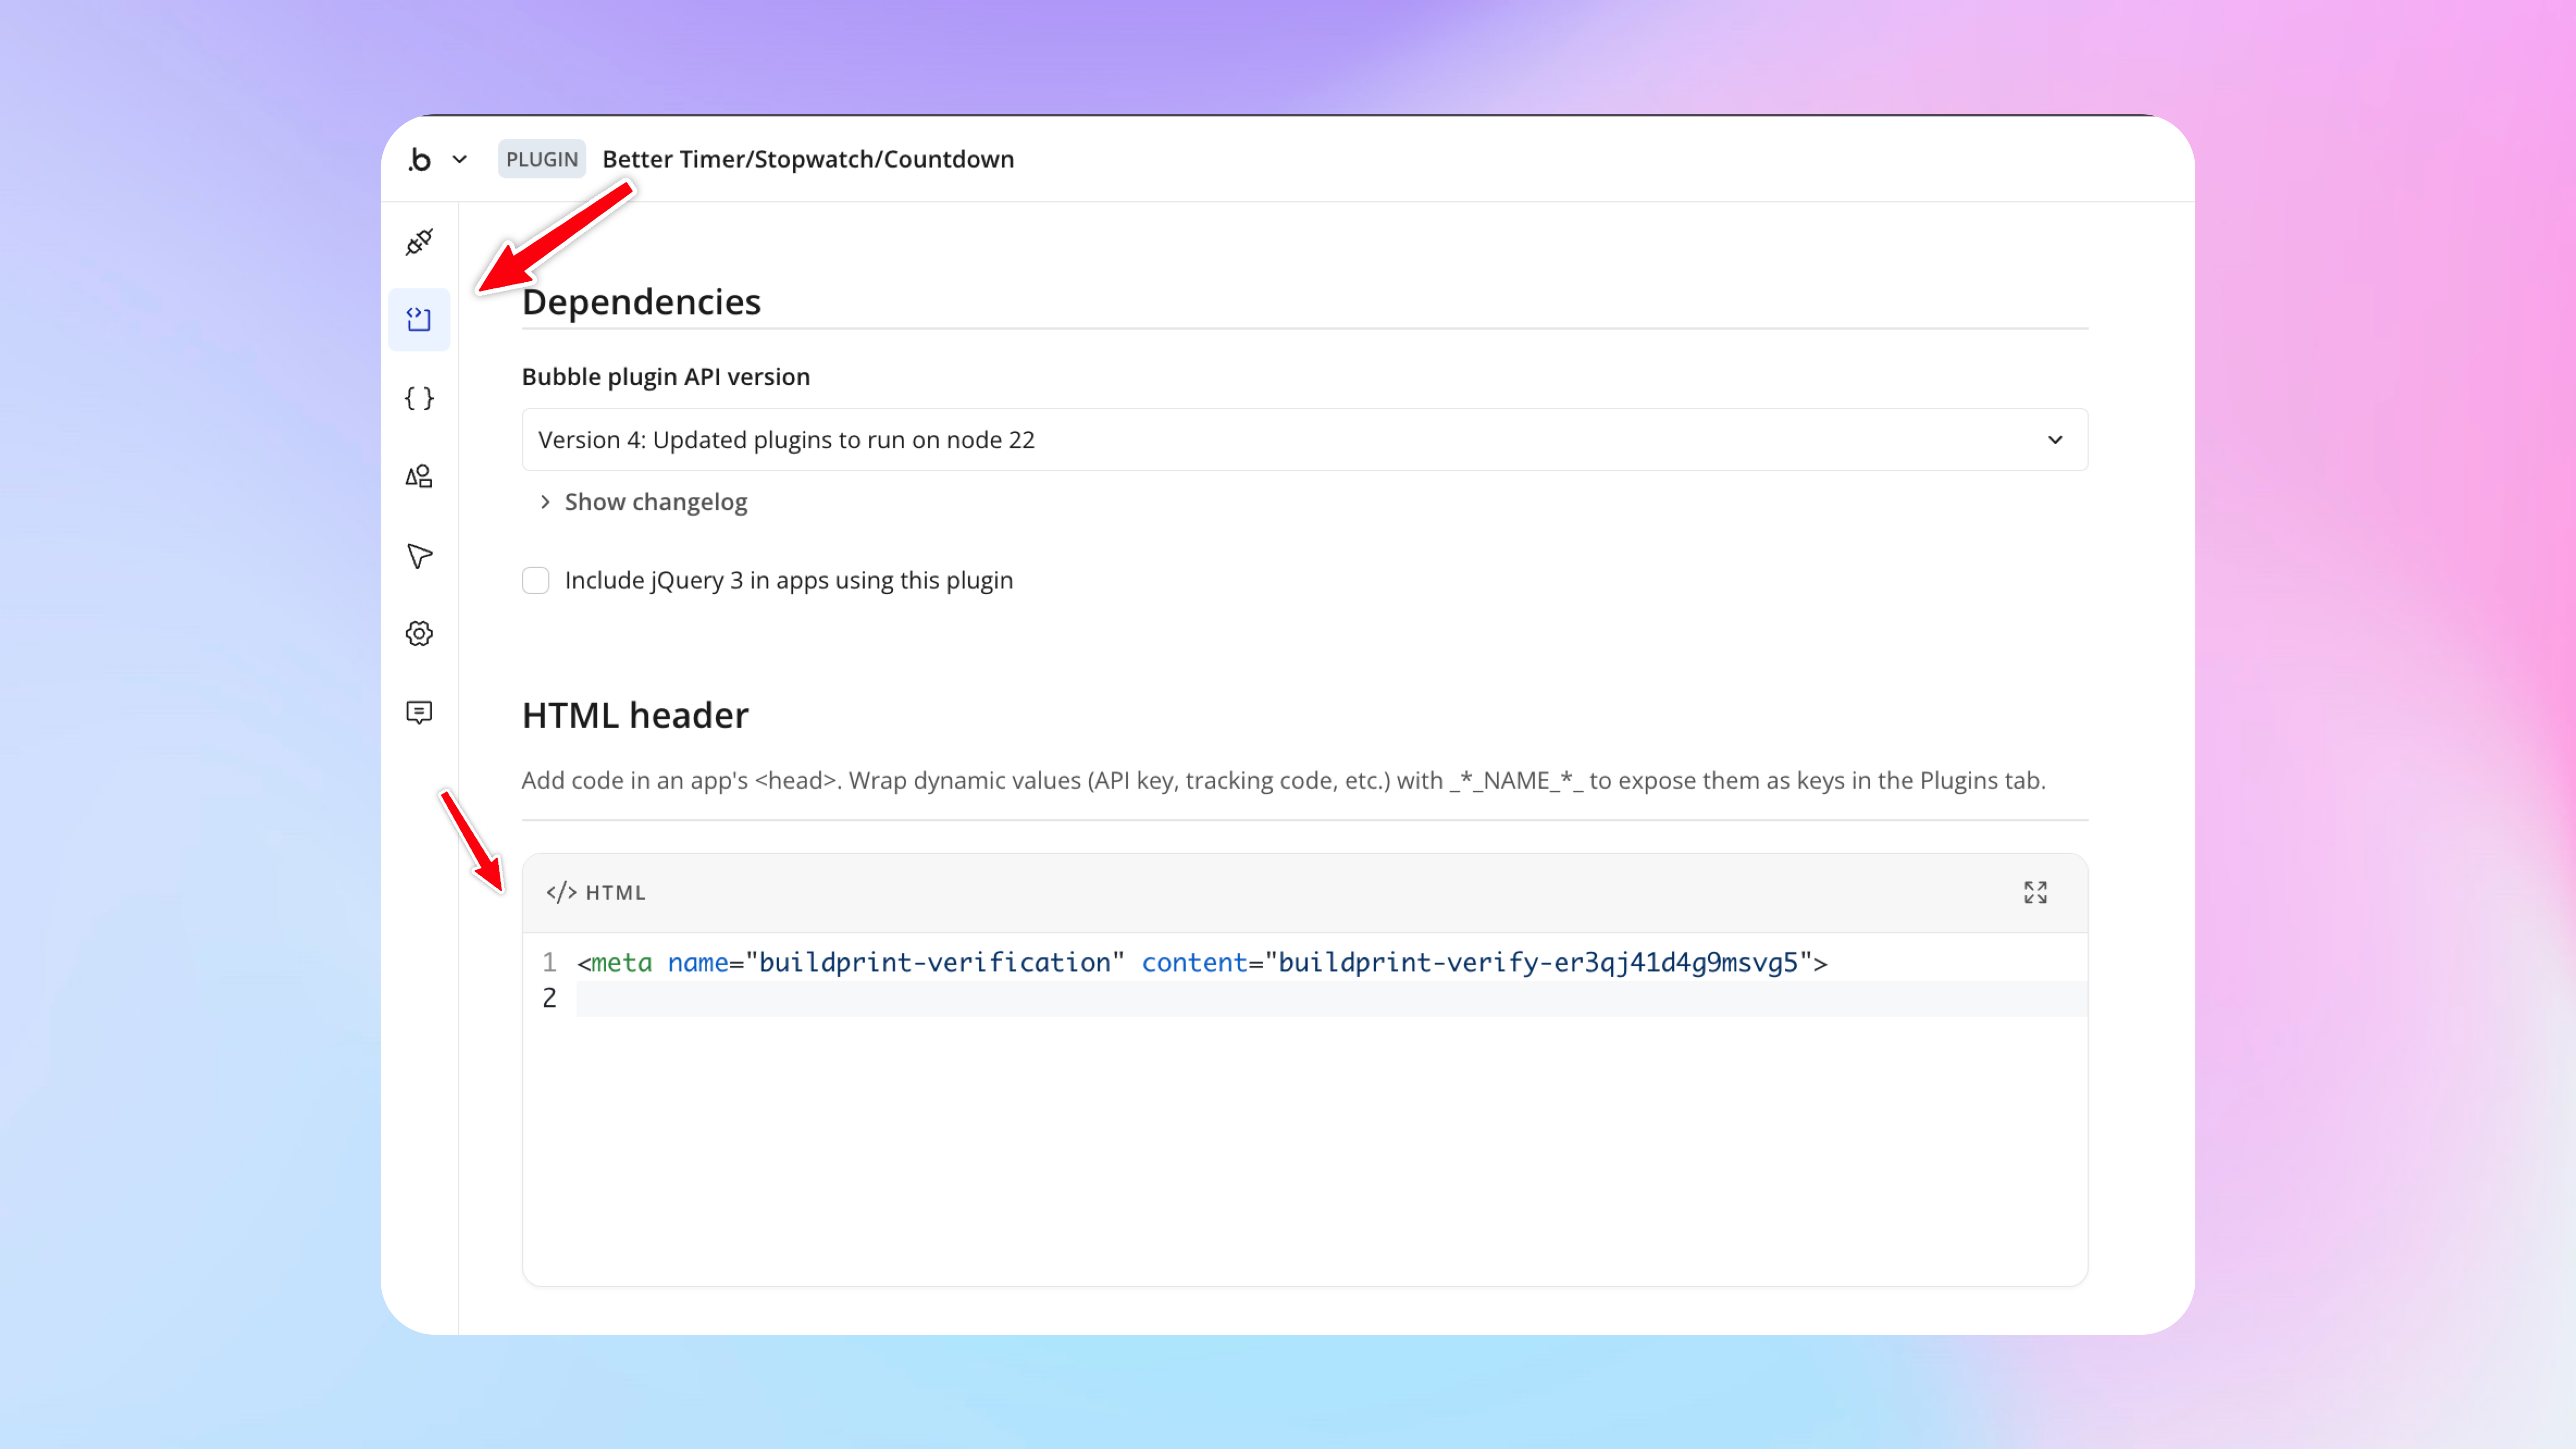
Verify a Bubble plugin
Buildprint gives you an HTML header snippet for the plugin.
Copy the snippet shown in Buildprint.
Paste it into the HTML header setting in the Bubble plugin editor.
Return to Buildprint and verify ownership.
Finish setup
Complete the remaining setup choices, then open your project.
Connect an AI provider if you want to use your existing provider account.
Choose the Buildprint plan you want to use.
Skip optional steps that you do not need yet.
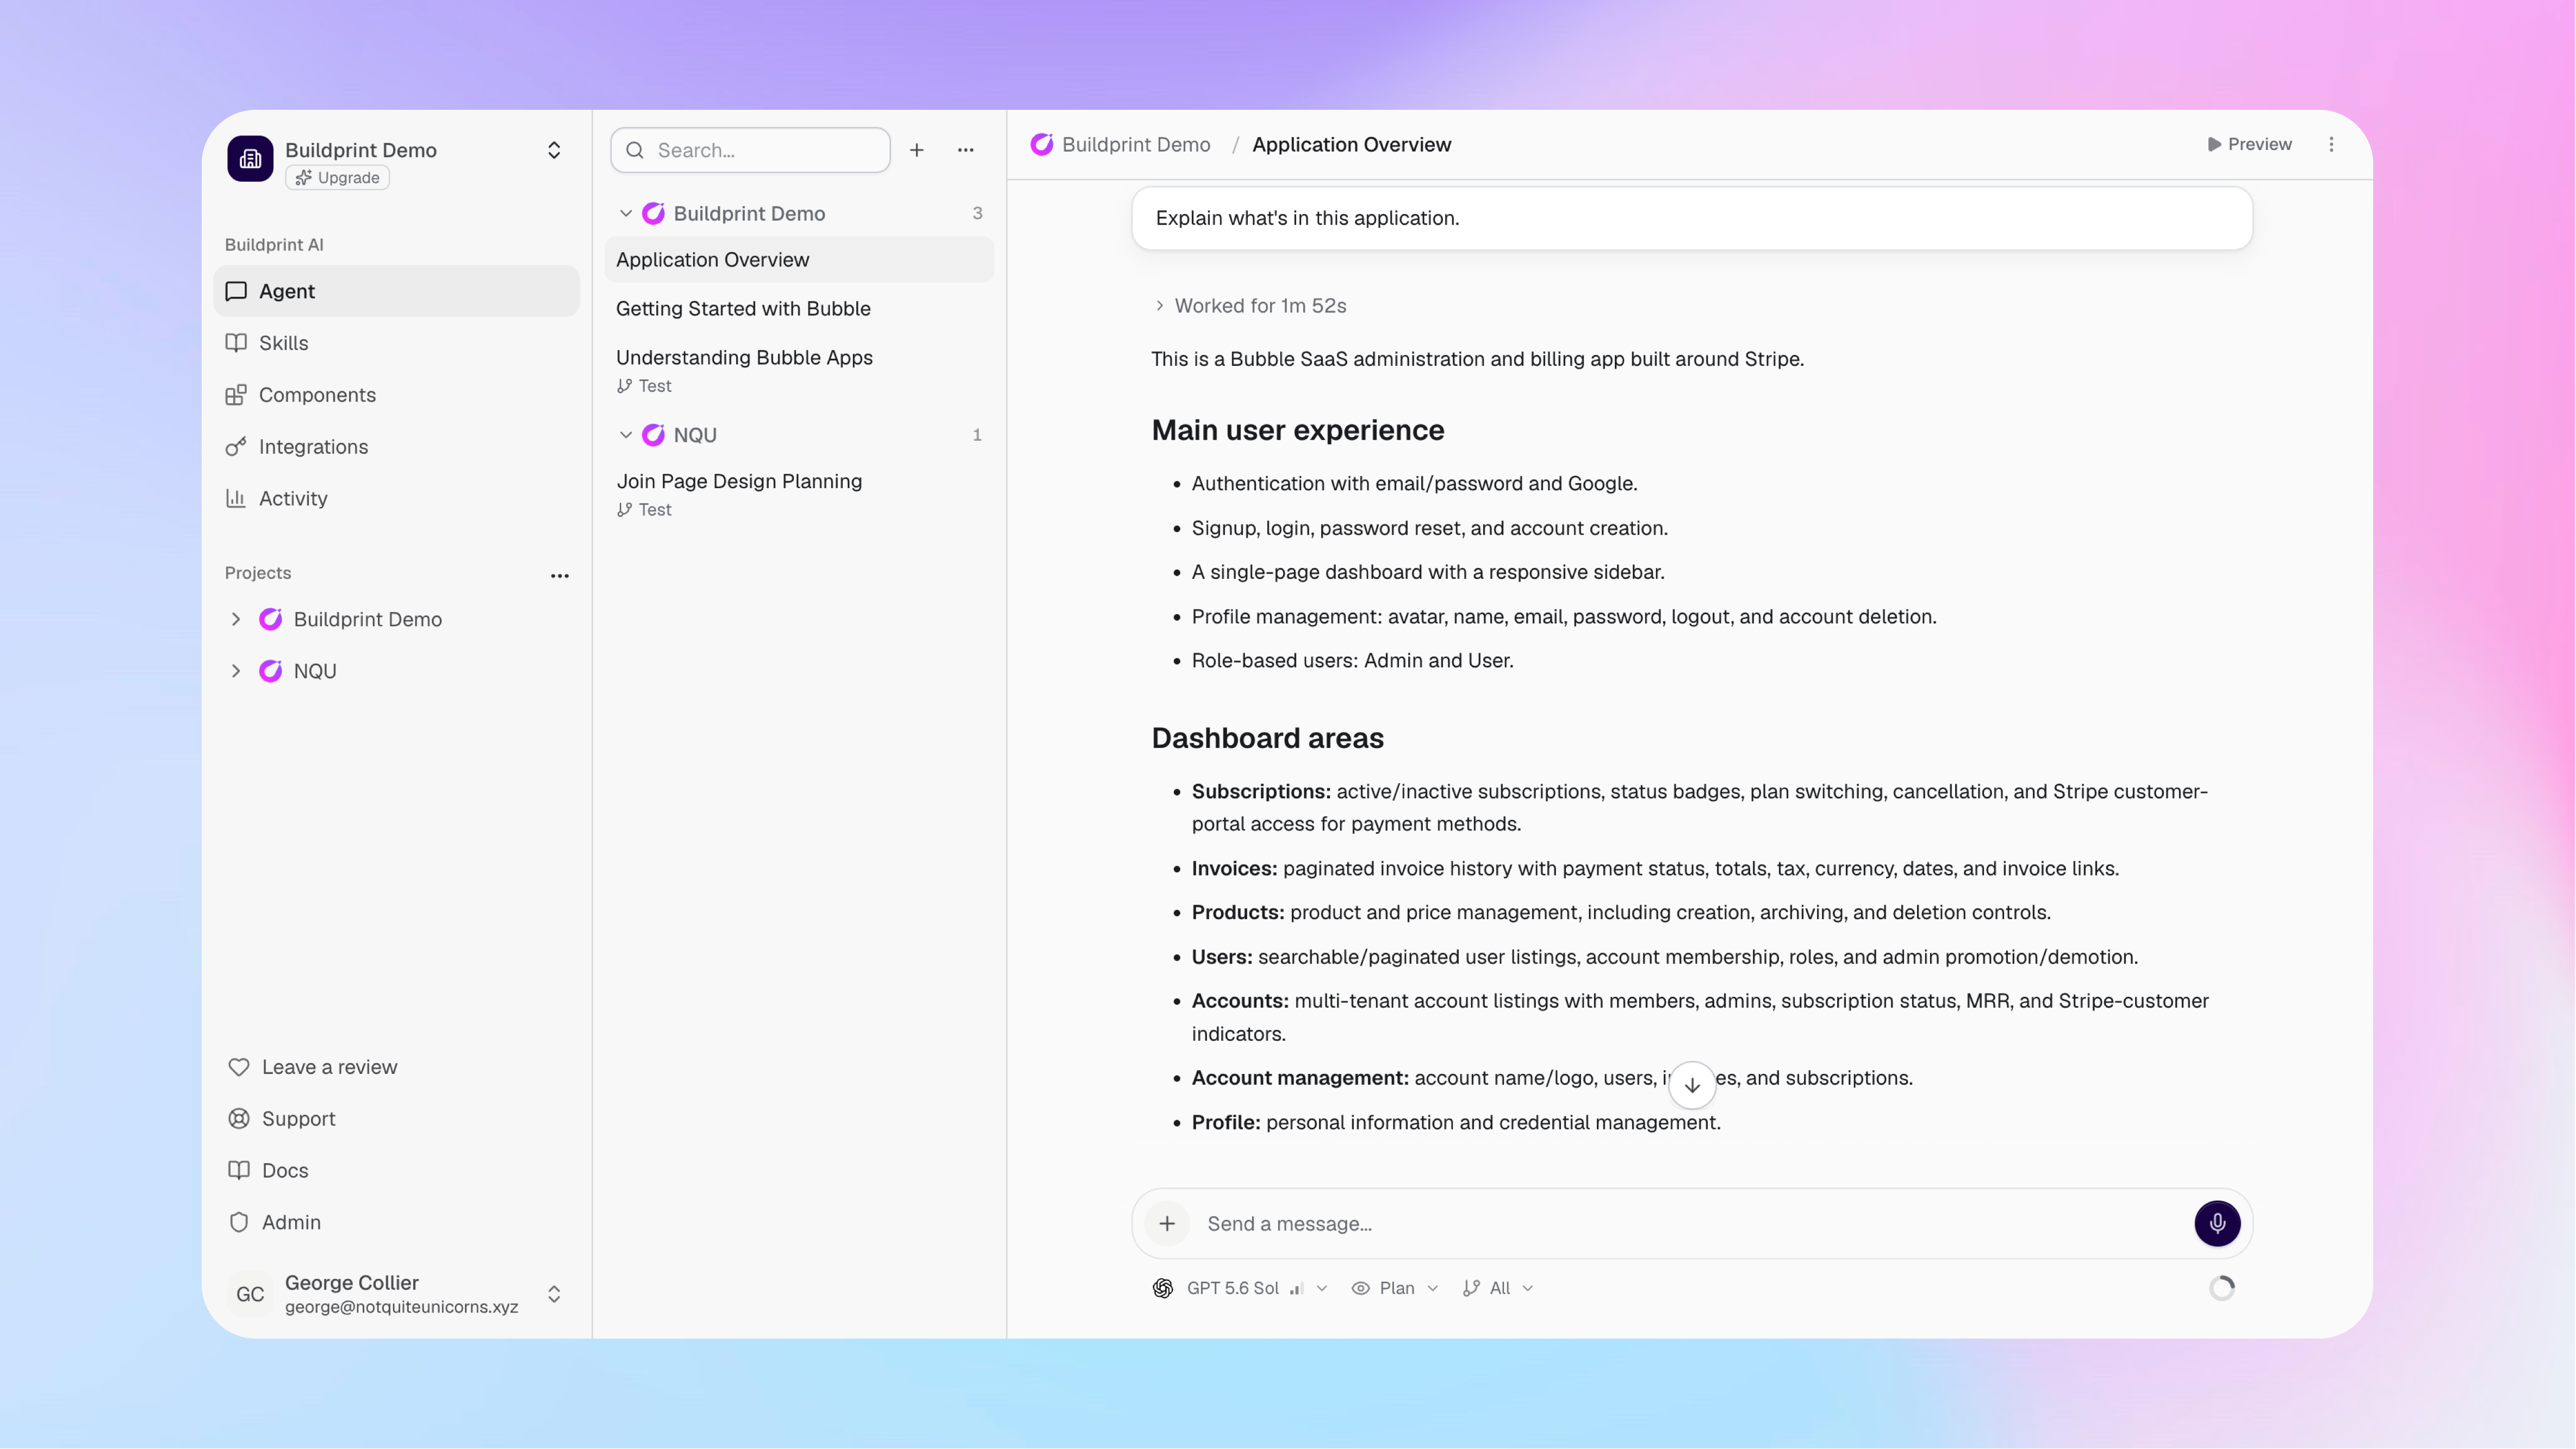
Your connected project appears in the Buildprint sidebar. You can now open Agent and ask Buildprint to explain the app, investigate a problem, or help plan a change.
Troubleshooting
Buildprint cannot find the collaborator invitation
Buildprint shows missing access
Update the collaborator permissions in Bubble, then check the connection again. The access summary in Buildprint shows which permissions have been granted.
The Bubble App ID is not accepted
Enter only the app ID / subdomain. For example, enter myapp instead of a full Bubble editor or website URL.
Metatag verification fails
Confirm that you pasted the complete tag into the header field for the test version of the correct Bubble app and it has saved.
Was this helpful?
Was this helpful?